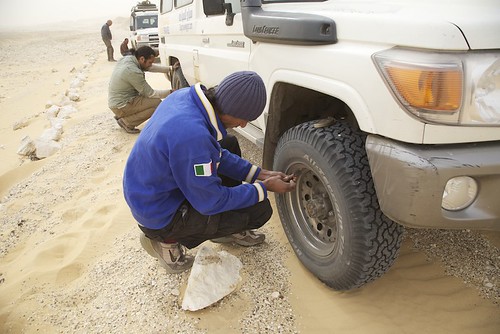
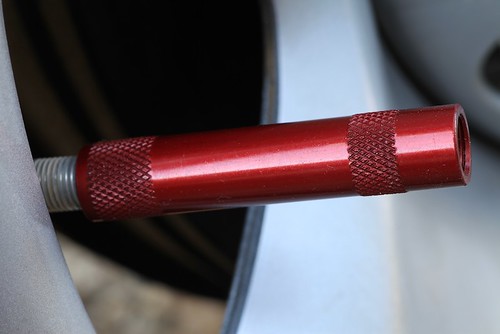
Quantcast
Channel: Overland Tech & Travel
Viewing all 72 articles
Browse latest View live

The TrekPak divider system

$
0
0


Few experienced travelers, photographers, or scientists would dispute that the ubiquitous Pelican case is the ultimate traveling container when the contents absolutely, positively have to stay protected from impacts, crushing, and dust and moisture incursion. I certainly wouldn’t argue (see here). I know someone who had to move several large Pelican cases full of equipment across an arctic inlet—by sea kayak. He simply rafted the cases behind the boat and towed them across. No problem. If you can deal with the relatively high weight of the empty Pelican, and the just-so-so volumetric efficiency, nothing will give you as much peace of mind when the equipment inside is worth quite literally 40 or 50 times what the case cost. It’s the cheapest kind of insurance.

But you can’t just toss your photography or video equipment inside a big plastic box, however sturdy. You need interior padding and organization. And that presents a bit of a dilemma.

The Pelican can be equipped with either of two options from the factory. The “Pick N Pluck” interior comprises an open-cell foam filler that is partially pre-cut into small square sections. You tear free the sections you want to create pockets to fit camera bodies, lenses, or other items. The result is snug and secure; however, once done you can’t re-organize to accommodate new or replacement equipment, and you must leave at least two cube-widths of the soft foam between items or the structural integrity collapses. That reduces available room significantly. Also, with constant use the open-cell foam degrades rather quickly. I’ve found the Pick N Pluck interior best when a case is devoted to one very expensive or fragile item, such as a monster 600mm F4 telephoto, where the tight fit and thick cushioning provide excellent impact resistance.

The other Pelican option is a set of padded, nylon-covered dividers, which rearrange and connect via hook-and-loop strips. This interior can adapt to new contents, but it’s quite limited in configuration and thus tends to waste space, and the hook-and-loop material is fiendishly efficient at collecting and holding on tightly to all sorts of debris, which eventually reduces its grip on itself.

Aftermarket options have been around for a long time, but every one I’ve used—such as the otherwise superb Lowepro Omni Pro in the link above—wastes a lot of volume due to redundant lids and straps, and dividers that are actually over-padded. How often I’ve wished for a thinly but densely padded divider system that wouldn’t rely on Velcro, had more structural integrity than open-cell foam, and could be re-organized easily to “suit the mission.”

Thanks to, of all things, Kickstarter, I may have gotten my wish. A new company called TrekPak has (rather spectacularly) defied recent odds on the crowd-sourced funding site and made it into full production with a modular divider system designed to match several sizes of Pelican cases, as well as a couple of high-quality daypacks from Deuter. 

Georgia Hoyer, the president of TrekPak, sent me a kit for a Pelican 1550, one of the most versatile mid-sized cases in Pelican’s lineup.

At first glance the pile of foam slabs in the box doesn’t seem very impressive. It’s not until you start assembling the unit using its clever U-shaped steel clips (with bright red pull tabs) that it gains form and, it turns out, superb function. The secret to the TrekPak system is the corrugated plastic core sandwiched between the layers of closed-cell foam. That core adds structural rigidity as well as the means to configure the kit to suit your equipment. The TrekPak kit contains enough sections of varying length to accommodate most needs, but, unlike the hook-and-loop-style dividers, if you need a shorter bit to create a suitable compartment, you can easily trim one with a straight edge and razor.


I laid out the camera gear I wanted to fit in the Pelican 1550, and began experimenting with the provided TrekPak sections. Eventually, after some trial and error, I fit the following into individually padded compartments: A Canon 5D MkII body with attached 24-105 F4L lens, a 5D body, further lenses comprising a 70-210 F4, a 15mm fisheye, a 100mm macro, a 300mm F4, and a 17-35mm F4, a 1.4 converter, and two EX550 flash units. Not bad at all, and there was room left over for batteries and CF card wallets. The dividers are easy to align and connect with the clips. It’s up to the user to attach or leave off the little red flags on each clip—they add a festive note and make it much easier to remove the clips, but aren’t necessary.

I could have used one extra full-length divider—the kit comes with two—and I had a few short sections left over. I’m hoping the company will eventually offer individual sections for sale to allow complete individual customization. Some customers might whinge at à la carte pricing for extra pieces, but many won’t need them, and the versatility would be worth the cost for those who do. My 70-210 lens, on its side, left enough room above it for another skinny lens; it would be nice if TrekPak offered thin foam without the plastic core for the user to fabricate bi-level compartments (not that I can’t easily find such material on my own; it’s just nice to have it all available from one source). With a little more configuring and a bit more material, I could have constructed a T-shaped compartment for the camera and attached lens, which would have been slightly more space-efficient than the square I wound up with. However, all in all I was extremely impressed with how much gear fit in the case, thanks to the just-right thickness of the TrekPak dividers. And the ease of reconfiguring to suit changing equipment is a bonus. 

So how does the Pelican case/TrekPak combination work in the field? As a transport case it’s brilliant. You don’t need any more padding than this system provides as long as your equipment fits reasonably snugly inside. And, as we already know, one’s confidence in the waterproof/dustproof security of all that expensive gear is unmatched. (There aren’t many other camera cases I’m willing to stand on to gain a little height for a photo with all my gear inside.)

As a user case—that is, to be at hand for a shoot when you need to access lenses, cards, and batteries—the Pelican/TrekPak is far, far better than my old Pelican/Lowepro Omni Pro combination, since there is no internal lid to get in the way. However, it’s obviously a vehicle-dependent setup—you wouldn’t want to go on a walking safari with this thing (look at those Deuter day packs if you carry a lot of equipment on hikes). And you’ll need an entire seat to accommodate the 1550 if that’s the model you choose. I’m planning to try a kit for the (smaller) Pelican 1510 rolling carry-on case I want to use for managing photo equipment on international flights.

While I suspect the vast majority of TrekPak kits will be used for photography or video gear, the system would be equally versatile for many types of delicate equipment used by those working in the field: spotting scopes, satellite communication devices, radio-tracking receivers—you name it. I’m planning to devote an entire Pelican case to all the impedimenta one accumulates when using the Canon 5D MkII and III as a video camera: external microphone, follow-focus unit, suction mount for exterior vehicle shots, stabilizer for hand-held tracking, LCD viewfinder—a ridiculous amount of stuff.

Let’s see—1550 camera case, 1550 video equipment case, 1510 carry-on, all with TrekPak divider systems.

I guess I’m a convert.


TrekPak kits start at $65: TrekPak 


Chris Scott's Adventure Motorcycling Handbook, 6th edition

$
0
0

I can think of no higher compliment to give Chris Scott’s Adventure Motorcycling Handbook than to say it is without doubt motorcycling’s equivalent to the Vehicle Dependent Expedition Guide, Tom Sheppard’s seminal and authoritative bible for four-wheeled expedition travel. The Adventure Motorcycling Handbook has just been released in a well-deserved sixth edition, and has once again been thoroughly revised and updated to include the most up-to-date information possible regarding planning, motorcycle selection, ancillary equipment, route possibilities, shipping, political situations—essentially about 90 percent of what you’d need to embark from scratch on a major motorcycling excursion, short of actual riding instruction (which you could get at the 2013 Overland Expo after buying the book directly from Chris).

The Adventure Motorcycling Handbook is a lively read, whether you’ve committed to a cover-to-cover marathon prior to buying a Ténéré and departing for Tamanrasset, or are just flipping and browsing for amusement. In addition to in-depth articles there are maps, many short, handy charts, and a good hundred text boxes: a complete Cyrillic alphabet, a primer on GPS, a section on black markets and bargaining, a brilliant two-page motorcycle troubleshooting guide, and, of course, a for-and-against chart comparing hard and soft luggage. Lois Pryce contributed a delightful and informative section on women riders titled “Adventure motorcycling—the bird’s-eye view,” which you’ll get if you know British slang. Grant Johnson penned the chapter on shipping—it would be difficult to find someone more knowledgeable on the subject. And Gaurav Jani, the solo traveler and filmmaker, discusses touring India and the Himalayas on a Royal Enfield—surely the only really stylish way to do so. There are a good two dozen other contributors as well.

The first half of AMH deals with preparation, equipment, and life on the road; the second half comprises route guides to Asia, Africa, and Latin America respectively. The route guides rightly concentrate on practicalities of money, border crossing formalities, customs, and so forth, and only briefly touch on main routes and sights. (I suggest augmenting the AMH with a Rough Guide once you’ve decided where you’re riding.) Finally, the last chapter, “Tales from the Saddle,” is worth the price of the book on its own. 

No such work is perfect, but I had to look closely to find flaws in the Adventure Motorcycling Handbook. Many sections were simply beyond my areas of expertise so I wouldn’t even attempt to critique them, but in other areas I noticed a few glitches, and one ancillary section contains misinformation I’d classify as potentially dangerous.

Some of the details on country information appear to be outdated or cursory. I imagine this is somewhat inevitable even in a regularly revised book; it’s just not possible to maintain perfect accuracy without a Fodor’s-sized staff. For example, the section on Kenya describes the equatorial town of Nanyuki as lacking anything but basic groceries; in fact there’s been a giant full-service Nakumatt there for at least a couple of years (along with a Dorman’s, perhaps the finest coffee chain on the planet, and a chemist stocking what is definitely the highest-priced sunscreen on the planet). The Namanga border-crossing section lists the price for a Tanzania visa at $50; but for some years it’s been $100 for U.S. (and, peculiarly, Irish) citizens, and U.S. bills must be dated later than 2006—two missing pieces of information that could cause significant hassle.

There’s a single page in AMH titled “Survival,” the information in which is so scant it would have been better left out altogether. Another section on (or rather, against) weapons clearly betrays an editorial viewpoint rather than objective information. Of course it’s Chris’s book and editorial stance, but knowing of several instances in which travelers saved their money and vehicle if not their skins by analyzing the threat and meeting it with aggressive resistance, I think readers would have been better served by a fair look at both sides of the issue.

Oh, and . . . the dangerous bit? All I’ll say here is, Chris, for God’s sake talk to me before you print the venomous snakes section in the seventh edition. The rest of you, ignore the entry (except for the perfectly true advisory that bites from such snakes are extremely rare) and consult a current source of information if you plan travel where venomous reptiles might be present - this particularly refers to the suggestion to wrap the bitten limb, which is contraindicated for many species. Rather surprisingly, Wikipedia has an excellent page on the subject in general, and good first-aid advice, here.

Aside from the snake-bite treatment suggestions, the Adventure Motorcycling Handbook remains the standard by which all its imitators will be judged—that is, if anyone ever works up the nerve to imitate it. Most highly recommended.

$23.95 Available direct from—well, through—the book’s website here.


The one-case tool kit, part 2

$
0
0


(Read part 1 HERE.)

By their nature, field repairs lend themselves to chaos: Something unexpected has happened in an unexpected place—often, given the capriciousness of the overlanding gods, at an inconvenient time in inconvenient conditions. Thus, organization is nearly as vital to a traveling tool kit as comprehensiveness and quality. 

Since I’m disorganized and absent-minded to begin with this takes on triple importance. If I don’t have a specific spot for every single item in my tool kit so that the hole is obvious as I’m packing up, I won’t just leave a socket in the dirt—I’m also likely to forget a wrench on a chassis rail, an extension balanced on top of a tire, and a screwdriver or two on the inside fender. I need my tools laid out like a surgeon doing a kidney transplant just to change a windshield wiper.

I started thinking seriously about tool organization when we had three four-wheel-drive vehicles in use at the same time—two of our own and a Jeep on loan from Chrysler. Despite my best efforts, tools wound up scattered among all three trucks, so when I needed the wrench set in the FJ40, it was in the FJ60. Socket to tighten the perpetually loosening battery hold-down on the Jeep? Sorry, the sockets are in the 40. Eventually I was able to equip each vehicle with basic stuff, but I decided I wanted a comprehensive kit that would fit in one case, never be separated, and could be tossed (or, um, as it turned out, heaved) into whichever vehicle was leaving on a major trip.

Rather arbitrarily I decided on a Pelican 1550 case. It’s 18 by 14 by 7.6-inch interior dimensions seemed to be about right to accommodate the selection of tools I hoped to fit inside—which, as detailed in the previous article, I wanted to make comprehensive enough to handle virtually any field repair up to and including transmission removal, differential or axle replacement, and major suspension work.

The first thing in was a 3/8ths-inch-drive socket and ratchet set—the most commonly needed tool set for most minor repairs. I looked everywhere for one that had the quality I wanted, the compactness I needed, and the selection of sockets I felt was essential, without blowing the budget. I could have gained the compactness by simply dumping a bunch of sockets in a pouch or fitting them to socket rails and storing the ratchets and extensions separately, but I’ve come to appreciate the organization intrinsic to socket sets that come in lidded, compartmented cases. Not only is everything in the set always together, neatly laid out, and instantly accessible; any missing piece is easily noticed when packing up.

Quality and supreme organization: Britool 748267Everything—quality, selection, and compactness—came together in a set from Britool, the venerable British manufacturer that supplied tools to Spitfire mechanics in 1940. The Britool 748267 set is a miraculously packaged assortment that includes SAE sockets from 1/4 to 1-inch, metric sockets from 6 to 24mm (not skipping any, like many sets do maddeningly), deep sockets from 5/16 to 3/4-inch and 6 to 19mm, a nice 72-tooth ratchet handle, a sliding T-handle (good backup if the ratchet fails), three different extensions, each with knurled finger grip and a hex fitting on top so one can apply a wrench if needed, a universal joint, and two adapters—plus several spline-drive sockets and a complete selection of slotted, Phillips, Torx, and hex bits with bit adapter. The lot is laid out cunningly in a plastic case just 10 by 15 by 3 inches. Amazing, and the quality is first-rate: All the tools have an even satin finish, the sockets employ the “Flank Drive” system, the short extension has a wobble end if you need to access a slightly off-center nut, and the ratchet head is user-serviceable. (Incidentally, the sockets are all 6-point rather than 12. At home I prefer the ease of use of 12-point sockets—which you don’t have to turn as far to fit over a nut or bolt—but for ultimate strength in a field kit the 6-point design makes sense.)

Before you stop reading and Google “Britool 748267,” I have to tell you that, apparently about 15 minutes after I bought my set, the company not only stopped production, but re-designed their entire tool line into something called Britool Expert, which, if my evaluation of a sample 1/2-inch socket set is any indication, is a step down in quality. If I’d known it at the time I would have taken out a loan, bought 50 of the 748267 sets, and would now be offering them at some usurious markup.

In the last two years, I’ve tried and failed to find a 3/8ths-inch socket set that comes close to the Britool 748267 paradigm. I discovered plenty of compact pot-metal sets from Far-East importers, and high-quality sets that took up too much room—never the right combination. A set from Sears came close, but the metric sockets ended infuriatingly at the relatively useless 18mm without including the frequently-required 19mm.

 Craftsman "Max Axess" - nice, but what's with the microscopic sockets?

Right now I’m evaluating another Craftsman set that employs the “Max Axess” design, meaning the sockets, ratchet head, and even extensions are all hollow-centered, thus obviating the need for deep sockets—you can slide a ratchet and socket over a nut even if the stud to which it’s attached sticks out ten inches. It combines a large and small ratchet, two short extensions, and metric and SAE sockets from 3.5 to (thank you!) 19mm, and 5/32 to 7/8-inch. (Not sure about the need for the microscopic 3.5mm and 5/32 sockets, but . . .) Sears says the 72-tooth ratchet is 45 percent stronger than their most popular ratchet, and the splined socket/ratchet interface appears to be at least as strong as the standard square drive, although I worry a bit about the strength of the hollow extensions—and the complete lack of longer extensions. The set is very well-organized, and very space-efficient in its case, although it still doesn’t match the tool density of the Britool 748267. (In a moment of helpless tool geekiness I figured out the tool/volume ratios for several cases. The Craftsman case encloses 7.6 cubic inches per item inside; the Britool case only 7.1 cubic inches—and I didn’t count the bit assortment.) The biggest problem I’m having with the Craftsman kit at the moment is that it sometimes feels backwards: The smaller end of the extension fits into the ratchet, and the larger end goes over the back of the socket. If you’re interested, it was here as of this writing, for a bargain $60.*

 Next up was the critical 1/2-inch-drive socket set. As I wrote in part one, I always figure that if I break out the 1/2-inch set on the road, it’s because something major needs repair—something quite likely to have stopped the vehicle or at least seriously affected it. So, more than any other component of the entire tool kit, I wanted to insure I had the highest quality 1/2-inch sockets and ratchet . . . yet I still wanted it to be compact, and preferably in its own case that would fit into the 1550. I had just put together a comprehensive eBay-sourced loose set of 1/2-inch-drive Snap-on sockets, but they’d pretty much been integrated into my rolling cabinet at home; plus, they were all 12-point sockets, and I wanted six-point for field use.

Britool "Expert." Not bad, but . . .

I tried a Britool Expert set, in the new blue-case-and-handle color scheme. It was compact and comprehensive—but I just wasn’t comfortable with the looks or feel of it. The chrome was thick, but orange-peeled in spots, and several features of the earlier Britool products had been eliminated. The ratchet mechanism didn’t feel perfectly consistent. Strangely, the word “Britool” appears nowhere—is the company afraid to have those old Spitfire mechanics associate the name with this stuff? It wasn’t really bad, just . . . Anyway, I kept looking.

Sears—nothing. Harbor Freight—just kidding. Then I discovered France.

Say what? Actually I’m referring to Facom ("Fahcomb"), a 90-year-old French tool maker that’s been called “the Snap-on of Europe.” Even though now owned by Stanley, and now basing production of some components in Taiwan, Facom seems to have retained its high standards; in fact I’ve seen a few web comments claiming the finish on the Taiwan pieces is a step up from the later France-sourced products. The Facom 1/2-inch-drive S.200DP metric set nearly matched the Britool Expert case in volume efficiency, had noticeably better finish, and included sockets from 10mm all the way up to a crankshaft-pulley-sized 32mm (the S.6BP is very similar, lacking only the shorter extension). I’m not fond of the palm-control directional switch on the ratchet—I prefer a lever—but it has a smooth and even 72-tooth action and is easily serviceable. Combined with the exquisite Snap-on 18-inch flex ratchet I detailed last time, I now feel I’ve got a nearly perfect 1/2-inch socket array.

Did I go off the deep end just to find good socket sets that happened to come in compact, compartmented cases? I can hear some of you (including Roseann) saying, “Uh, yeah . . .” and perhaps you’re right. Okay, you’re almost certainly right. For me that compartmentalization adds a sense of order that I find incredibly valuable when I’m lying on my back in the dirt under a dangling part of a vehicle that shouldn’t be dangling. The downsides are price—I paid significantly more for these neatly-packaged tools than I would have buying, say, open-stock Craftsman tools and finding my own boxes—and warranty coverage: I’m pretty sure there are more Sears stores in the U.S. than Facom dealers (not to mention the no-longer-made Britool kit)—but then again I have very little fear of these breaking. The cases add some weight to the whole tool kit—and despite my obsession with volumetric efficiency, they take up more space than a socket rail and a small tool roll. However, I’ve been using the evolving core of this kit in the field for two years now, and I’ve yet to regret the trouble it took to put together. Most telling: I have yet to leave a single socket in the dirt.

Next: Screwdrivers you can hammer on, a cheap hacksaw that beats out an expensive one, and a fitting that converts your ratchet into a torque wrench.

The main U.S. Facom distributor is Ultimate Garage. 


*Addendum: The jury is in on the Max Axess kit, and it's thumbs down. The biggest problem is the bulk of the extensions, which as mentioned fit over the socket. Twice in the brief time I was evaluating the set that bulk posed problems getting "axess" to nuts close to other parts. Also, the lack of a longer extension has proven to be a very real drawback. Sorry Sears.

Note the extra diameter of the Max Axess extension on the bottom. Each extension has a 14mm socket attached. (Note here too the nice knurling and wrench-compatible hex end of the Britool extension.) 

Easy trip assistance app

$
0
0

by Roseann Hanson

How many times have you been reading a magazine or book, and come across some place you want to jot down to remember to visit, such as a landmark, a restaurant, a museum, or a trail?

In the past I either scribbled these onto a nearby post-it note or in a file on my computer. Inevitably these got lost in the shuffle of life, or are too difficult to locate when I knew I was going to be in a certain place, or I just plain forgot to bring my file with me.

Recently a friend mentioned how interesting Scotty's Castle was on their overland trip through Death Valley. I started to jot it down in a notebook in the truck, but then thought, I wonder if there is an app for that?

Ever the fan (and growing) of organizing my life by iPhone, I searched the AppStore for "record places" or "remember places." One of the first to come up was the very promising My Places by VoyagerApps.com. Using your GoogleMaps account, it promises to let you see and organize your saved "places" in real time. I downloaded the free version to test it out, but unfortunately it was so annoying, I deleted it. The free version won't let you do anything without constant interruptions from pop-up notifications asking if you want to download and try other apps (presumably by VoyagerApps.com)—a different ad popped up every 30 seconds, literally, and you have to stop and click "No, thanks" every time. Then it would not let me save anything or see my Google places unless I bought the app, so I could hardly see if it worked or not. I don't mind buying apps, but this was a real stinker.

Then I tried a cool-sounding app called PintheWorld, which allows you to pin and save places of interest, give them categories (different colored pins, too), and see them when passing through a location. Sounded perfect! But unfortunately the developer uses the new iOS 6 in-house (and yes, totally lame) Apple Maps app and it is so inaccurate and picky, I could not find businesses I knew were there. The trick turned out to be that you have to type the exact, and I do mean exact, address down to the country and zip code. And then you have to manually name it and add details. Too much work. I just knew, with the power of the Internet and Apple, there had to be a solution.

Turns out it was right there all along: Google just released their brilliant Google Maps app for iPhone—pair it with your Google Maps account, and you're good to go. 

(For those of you who haven't followed the little cyber drama between Google and Apple, Google was the original driver behind the superb Maps app on the iPhone but last year Apple and Google's relationship melted down, and Apple replaced Google as the data source with TomTom. My own side-by-side comparision between Google Maps and the Apple iOS 6 Maps bore out all the crazy criticism of the incredibly bad app. The famous tech geek David Pogue even called it "the most embarrassing, least usable piece of software Apple has ever unleashed." I could call up Google Maps, looking for the new Wanderlust Brewery in Flagstaff and up it pops . . . on Apple's Maps it fails to find anything, or sends me to Connecticut.)

But back to how to use the Google Maps and your Google account to save cool places to visit (after downloading Google Maps app you need to pair it with your online Maps.Google.com account).

I wanted to save Scotty's Castle as a place of interest, so I just hit the search bar, typed in Scotty's Castle, and up it pops (see screen shot, right). Swipe up on the name Scotty's Castle in the bar at the bottom, and it gives you a menu of buttons—Call, Save, Share. Hit Save, and it puts it into your Google Places.

On this screen you can also browse things like photos, hours, reviews, distance from current location, and other useful information.

Then, next time I'm in Death Valley area, and I want to see if it's nearby, I fire up Google Maps app and any saved Places show up as yellow stars (see below).

I am trying to find out if the star colors can be changed, because the yellow is hard to see against the yellow roads. And they only show up at a certain zoom magnification.

The next screen-shot set below shows all the restaurants and cafes saved for Flagstaff, near Overland Expo. Click on a star and a pin pops up; click on the pin and you get the easy-to-read information popup at the bottom (swipe it up to see the details).

Ideally Google will eventually let us categorize and organize our Places, and edit them from either the app or through the Maps.Google.com. It would be nice to filter for things like restaurant, art gallery, museum, trail, or other category, to help minimize clutter if you have marked a lot of places in one area.

But otherwise it looks like it's going to be a very useful tool for travel anywhere.

Google Maps app is great for storing places you want to visit, like these restaurants and cafes in Flagstaff, near Overland Expo.

Home-away-from-home tour (JATAC update)

$
0
0


Everyone—everyone—who sits for the first time in the dinette of our Four Wheel Camper and looks around, says exactly the same thing: “I can’t believe I’m in the bed of a Toyota pickup.”

It’s understandable. We had the same reaction when we sat in our first FWC in 1994, and that one fit our compact 1992 Toyota pickup. The new, wider Fleet model on the new, wider Tacoma displays even more of a fifth-dimension sort of spatial trickery. There’s a bed the size of a couple of barroom pool tables over the truck's cab, comfortable eating (or laptop working) room for two at that front-mounted dinette—underneath which is the grate for the hot shower. The galley (a term that seems more nautically jaunty than kitchen) incorporates a two-burner stove, a sink with pressure water fed from a 20-gallon tank, and a proper, compressor-driven fridge with freezer compartment. There’s storage everywhere, and a Porta Potti tucked under a back cabinet, across from two deep-cycle batteries. Overhead, LED lighting renders the interior as bright as you want when natural light isn’t flooding in through the four huge screened windows in the canopy.

Our first FWC seemed luxurious at the time. The new one, as I mentioned to Roseann, seems like the old one after it won a spot on Xtreme Kamper Makeover. Here's what it looks like inside.

Looking forward over the truck's cab. The bed in its extended position is . . . big (a bit over six feet wide and seven long), and the cushions are thicker than on our first FWC. Since both of us are under six feet (I'm 5'9"), we can sleep sideways even on this mid-size model, which allows us to leave two of the near cushions at home to save space (they won't fit on top of the main cushion when the camper's roof is closed). We worried that the gas lift-assist struts would be in the way, but that hasn't been the case—there's plenty of room behind them for both of us.


Looking in from the door. Lots of storage in the cabinets on either side. A Porta Potti fits in the near-right-side bottom cabinet. Cabinet materials and hardware are much improved over early models. The black door is the Dometic two-way fridge (12VDC and 120VAC). The grate for the shower is visible under the dinette table; the curtain tucks underneath it and clips to hooks on the ceiling. Controls and plug-in for the shower hose and wand are behind a hatch around the corner of the left cabinet (visible in top photo). The wand has a button that stops flow to conserve water. Duplicate shower controls are outside for remote/fair-weather bathing.

We discovered that two low-profile Bundu boxes from BunduGear.com fit perfectly onto the slightly recessed shower grate; we added a strap across the top and we have excellent storage for tools, boots, firewood, etc.


Hot and cold pressure water; water heater adds six gallons to the total water capacity (main tank is 20 gallons). Standard two-burner stove; a recessed stove with smoked-glass cover is optional, with a matching sink (also covered with smoked glass). Good working room on the right and also on the cabinet top above the fridge opposite. Silverware drawer could be bigger.

Stove has room for one big pot and a smaller one (or kettle). This stove has no pietzo ignition, and the rear burner is tricky to light with a match, especially if the front burner is already on. A gas match helps a lot. However, it's clear from the warning labels that if you actually use this stove YOU WILL DIE.


Vanity with mirror and storage has proven perfect for toiletries, clean towels, and small clothes. The Dometic fridge has a venting latch that holds the door slightly open when not in use.


Control panel. Cut off at top is the Global Solar charge controller and monitor. Underneath are two switched 12V outlets. Beneath them is the switch for the water heater; beneath that is a dual monitor for battery level and water level, with a switch to power the water pump for the sink and shower. 120V outlet is active when hooked up to shore power.


Inexpensive custom touches: Roseann found these towel bars at Target.


More customizing, courtesy Target: An inexpensive yoga mat was cut up to fit every cabinet bottom to reduce sliding and scuffing; a compact dish holder/drainer; folding fabric bins; spring-loaded curtain rod keeps items secure on shelf.

To the right of the under-sink storage is a deep, tall cabinet in which perfectly fits a 4L airtight OXO canister that we use for "wet" (i.e.: stinky) garbage like onion cuttings or coffee grounds; and behind it, a Snow Peak Multi-Purpose Cook-Set 3 (nesting 2 stainless pots, strainer, lids, and cast iron fry pan).


And . . . the bar is open. Under the right dinette seat was this spot perfect for safe storage of vital liquids. Swiss ammunition case holds larger bottles of more serious stuff. Hatch with finger hole is access to turnbuckles that secure the camper to the truck's bed.

Detail of the Swiss ammo bag converted to travelling bar. A very good friend gave us this as a camper-warming present. Shorter bourbon and whisky bottles fit perfectly.

Detail of the Closet Maid mini fabric cubes (7.5 x 5 x 5) from Target, which fold flat when not needed. Roseann cut leftover pieces of the yoga-mat padding to make bottle protectors (could there possibly be a better use for a yoga mat?). These cubes fit perfectly in the narrow spaces under the seats and three-across in the pantry storage (under the vanity).

Sources:

Bundu boxes - BunduGear.com

Global Solar panels and charge controller - GlobalSolar.com

Snow Peak cookset - SnowPeak.com

OXO canister, dish drainer, towel bars - Target.com

ClosetMaid Mini Fabric Drawers - Target.com

Swiss ammunition bags - try your local military surplus store, eBay, or here

Good friend who gives you three bottles of best whisky and bourbon as a camper-warming - find your own

The trusty Motorola 9500

$
0
0


Shortly after we published the story of our BGAN review in Mexico (here), which became a real-life test of the technology, I got an email from our friend John Knights, a senior Land Rover Experience instructor in the UK who’s also been on and led many major expeditions in Africa. John bought one of the very first Motorola 9500 satellite telephones in 2001, and has been using it since. 

The 9500 was a bellweather in the development of satellite telephones. When I made my first sat phone call in 1999, from a camp in Zambia, the device I used required a bulky tri-fold antenna which had to be precisely aligned, and which came with dire warnings not to stand within three meters of the front of it. Just two years later, when the financially troubled Iridium network finally got up and running for the final time, you could make the same call with a one-piece handheld 9500 and stand anywhere you wanted (as long as it was outside). 

Since then, John has used his 9500 on more than one occasion to manage emergencies in the bush—some of them mere inconveniences, some of them more serious. Here are a few of his recollections. 

Zimbabwe 2001 (chasing a total solar eclipse in the north of the country): The Defender 130 we had hired blew out two tire sidewalls. Although it was equipped with two spares, once both were used we would have been stranded had we suffered another blowout—highly likely on remote African dirt roads. A quick call to the hire company office had two spare tyres and inner tubes on a light aircraft to a nearby safari lodge, who dropped them off in a powerboat to where we were camped on the shores of Lake Kariba. 

Death Valley 2002 (touring the scenic Wild West in a rented SUV): We had journeyed off the beaten track to see the famous moving rocks. Returning down the rough dirt track, we were passed at speed by another SUV. They shot off into the distance, and I commented, “He must have much better suspension to travel at that speed on this road.” A few corners later we found the SUV, wrecked—he had lost control and hit an embankment, launching the car airborne, going end over end twice before landing back onto its wheels. Thankfully the occupants where unharmed, but had no supplies or recovery gear with them and were surprised their mobiles did not work. I produced my trusty Motorola, rang the ranger station number off the park map, gave them our exact position from my GPS, and waited until the rangers arrived. In the meantime we found out the family concerned were also in a rented SUV and were due to fly home that evening. I’d love to know what he told the hire company! 

Australia’s Blue Mountains 2003: Touring in a hired car we came across a 4x4 on its side. The driver had gotten into a skid on the loose gravel road, and aimed for the embankment rather than the drop off. Again everyone safe but no mobile coverage, but a swift call from the Iridium had a rescue on the way.


Namibia 2003: We set a new record on this trip for number of days without a puncture (seven I think), but that meant we were in the middle of nowhere when the first one happened. The puncture itself was not a problem, but when the locking wheel nut key split while reinstalling the wheel, it did create a problem when we had a second puncture and could not remove the locking nut. Again an Iridium phone call to the hire office had a man with a hammer and chisel on the way, although we did have to spend an unexpected extra night out on route. Our journey was not actually saved by the man with the chisel, but buy the sister vehicle to ours from the hire fleet. The guests driving it rolled it over a couple of miles from where we were. Armed with their wheel nut key we were able to remove our flat tyre, and we then took normal wheel nuts and spare tyres from the wrecked 110 to allow us to continue.* 

Whilst I would love to have an all-singing-all-dancing satellite communication set up that gave me calls, high-speed internet, and a wifi hotspot, at the end of the day the ability to raise any help is a blessing and I’m sure my trusty 9500 will see a few more adventures yet.


Ocens (here) carries the full line of Motorola satellite telephones, including the current 9555.

* An easy trick (no doubt discovered by wheel thieves) is to find a 12-point 1/2-inch drive socket that's just too small to fit over the locking lug nut, hammer it over the nut, then use a breaker bar to remove it. I've used the technique a half-dozen times and have yet to fail. JH


The one-case tool kit, part 3

$
0
0


(Part 1 is here, and part 2 is here)

It’s been drilled into us from the first time we picked up a toy hammer to tap a square block into a square hole: Use the right tool for the job.

The tool that most frequently falls afoul of this axiom is without doubt the slotted screwdriver. It’s been drafted into double duty as a paint-can opener, a scraper, a chisel, a punch, a pry bar, and worse by, I’m willing to bet, every single person reading this. Millions of them have been blunted into uselessness for their primary function after years of abuse in secondary roles. 

So the hard and fast rule for field repairs is never to risk the function of one’s screwdrivers by employing them for non-approved secondary tasks. The tool kit should incorporate cold chisels for chiseling, punches for punching, and a scraper for scraping.

However—frequently one will come across screws that have seized into place, and which no amount of torque on a standard screwdriver will budge. The normal procedure in a home shop would be to break out the impact driver—a fat grip with an angled anvil inside which, when provided with a bit to fit the stuck screw and given a sharp whack with a hammer, imparts a sharp loosening impact and twist to the fastener. My impact driver has saved me much time and grief when working on older vehicles.

The problem is that an impact driver is a heavy and bulky thing for its single purpose, making it troublesome for a traveling tool kit. But there’s a little-known fact regarding impact drivers: the vertical impact on the fastener has as much to do with freeing it as the twist the driver provides. Therefore, if you simply hold a standard screwdriver against a stuck screw and give it a whack, the odds are good it will be sufficient to do the job.

But there we are abusing the screwdriver again. Furthermore, most screwdrivers have plastic handles, which are not only likely to shatter when struck, they also absorb enough of the hammer’s impact to blunt its effect on the screw.

Enter the Facom Protwist “Shock” screwdriver. Here’s a screwdriver with a specially hardened steel shank that extends all the way through the handle to a cap on its end. The company says the tool is designed to “withstand gentle impact to free stuck fasteners.” That’s right: You’re actually invited to whack this screwdriver with a hammer (within reason, obviously).

Neat feature, but after all the need for it rarely occurs, especially if the average age of the vehicles in your fleet is younger than the three-decade average of ours. Fortunately the Protwist screwdrivers are excellent at normal screwdriving tasks as well. Each one has a fat, ergonomically secure and grippy handle—unlike the frightfully expensive set of Snap-on screwdrivers I invested in 20 years ago, which had miserable, slick, hard plastic handles and wound up relegated to duty as spares within months. The Facom AWCK.J5 set (don’t ask me how they come up with these designations) comprises the five most-used configurations—a number 1 and 2 Phillips and three slotted heads, 8, 6.5, and 4mm. All but the 4mm driver have hex fittings so you can apply a wrench for greater torque, another good method for tackling a recalcitrant screw (as long as the screwdriver fits the screw head properly). The Phillips and slotted tools are differentiated by yellow and red caps and the appropriate icon for easy identification when stored handle-out in a tool roll (and each has a little “wear your safety glasses” silhouette as well—pay attention).

Unfortunately I couldn’t find a U.S. source for the Protwist “Shock” screwdrivers. But a supplier in England, Primetools.co.uk, carries them and has good prices plus fast trans-Atlantic shipping.

Alternatives? If you don’t need the hammerable feature, the standard Sears Craftsman sets such as this one are hard to beat for 20 bucks, although they also lack the wrench-compatible hex fitting, which leaves you no way to augment the torque you can apply to the screw short of clamping a pair of pliers to the handle, which is kinda rude. Better is this Kobalt 12-piece set I found at Lowe’s. These do have the wrench fitting, and the set includes two offset screwdrivers—wretched little tools that will nevertheless sometimes winkle out a screw no other driver can get to.

While we’re on the subject of removing stubborn stuff . . . I consider a hacksaw to be a must-have item in a comprehensive tool kit. And in case you’re thinking by this point I’m a helpless sucker for obscure and expensive tools, the best traveling hacksaw I’ve found cost me $6.99 at Ace Hardware.

I started out with a fancy aluminum-framed item that caught my eye when I was first musing on the idea of a one-case tool kit. Hey, aluminum—lightweight. Perfect, right? Not so much, at least not this one. First, it was bulky and took up way more room than its expected frequency of use justified. It also only accepted a 12-inch blade. Worse, use revealed a serious design flaw I should have noticed at first glance.

Which is better, the $30 hacksaw or the $6.99 hacksaw?

Any framed hacksaw will only let you cut things as thick as the clearance between the blade and the spine of the saw, unless you can move the saw around and cut from the other side. My aluminum-framed saw had a fine four inches of clearance—but only in one spot thanks to the arched spine. So when cutting through, say, a 3.5-inch-thick tube, by the time I got near the other side my cutting stroke was reduced to about one inch. Stupid.

Grooves on the left accommodate different blade sizes, and by filing the groove on the right . . .

Then, while browsing at the Ace I found a simple, steel-framed hacksaw, which proved to weigh less than the aluminum one and was far more compact. Grooves on the adjustable half of the spine engage a through-pin on the fixed part to allow the use of different-length blades; furthermore, by filing a third groove near the front of the solid section I can now remove the blade and make the saw collapse to just 13 inches in length, so it fits along the short side of the Pelican case and takes up scant space. I store the blades in the tool roll that holds screwdrivers. It’s single downside is that the blade can only be attached vertically; the aluminum model can also hold the blade at 45 degrees for cutting when overhead clearance is reduced.

. . . the saw collapses to fit almost unnoticed along the side of the Pelican case.Now—back to obscure and expensive tools.

If you’re ever faced with a major repair in the field—replacing a clutch, halfshaft, differential, or birfield for example—you’ll also be faced with the manufacturer’s torque specifications when it’s time to put everything back together. Sure, you can guess and bodge it, and I’ve done so many times without catastrophic consequences when home and the torque wrench weren’t more than a few hundred miles away. But if you’re in the middle of a major trip you don’t want to risk the repair and perhaps the trip by over- or under-torquing a fastener on a critical component (such as, say, the main bearing caps on a crankshaft . . .).

 The problem is, a torque wrench is a long and bulky thing that performs exactly one function—you do not want to use it as a standard ratchet or breaker bar. So how about a palm-sized tool that turns any 1/2-inch ratchet into a torque wrench? That describes the Facom torque adapter—but wait, there’s more. The Facom unit also functions as an angle indicator. Many newer vehicles (Land Rover especially comes to mind as an early adopter) employ “angle-controlled” fasteners, designed to be tightened a certain number of degrees beyond snug. The Facom torque/angle adapter will do both tasks. It comes in a number of ranges; mine functions to 200NM (150 pound-feet, selectable on the readout) of torque, and is accurate to within three percent.

I have to say I found much less expensive torque adapters via a quick Google search, but none that were as compact, or that were capable of both torque and angle measurements. When Roseann asked, “Well, how much did it cost?” I answered: 

“What lovely weather we’re having.”

Next: The rest of the kit: Will it fit? 

The Red Oxx Lil Roy

$
0
0

Recently Jim Markel, the CEO of Red Oxx (and son of the founder), contacted me to ask if I’d like to review something from his company’s line of heavy-duty luggage.

I was already familiar with their fine, U.S.-made Sherpa duffels, which, unlike many competitors, employ a rectangular box design that maximizes every cubic inch of space in the back of a vehicle or the cargo compartment of a bush plane. I asked what he might have that I hadn’t seen, and he mentioned a small tote called the Lil Roy. It sounded useful, so I asked him to send one.

He sent five. And after casting about to find uses for them, I’m glad he did. 

Think of all the small items you typically carry in a vehicle that could use extra protection, organization, or just visibility. A quick glance around our FJ60 before a recent trip to Mexico’s Sierra Madre, where we’re surveying mammal populations using automatic trail cameras, revealed a bunch of potential applications. There was a pair of handheld two-meter radios we use to stay in touch on the area’s mountainous trails; Roseann’s Swarovski and my Leica binoculars—both armored and tough, but worth about a zillion dollars each and thus nice to keep cased when possible—several field guides; the remote for the winch (kept in the center console and always tangling in other stuff); the trail cameras themselves, and several other odds and ends.

Like all Red Oxx products, the Lil Roy is made in Billings, Montana. You won’t find any fatuous tags reading, “Designed with pride in America.” (Translation: “Assembled by small children in an Asian sweatshop.”) The only items the company has made outside the U.S. are the clever little “monkey fist” zipper pulls, which are tied in a small village in Guatemala, where Red Oxx built a workshop with a bathroom, shower, and cooking facilities, and recently granted a microloan to build a corn-grinding mill. Fair enough.

Although the Lil Roy is a compact nine by three by six inches (175 cubic inches), it’s sewn from the same 1,000-denier Cordura as their largest duffels. The #10 YKK toothed zipper looks comically large on a bag this small, but it’s stronger than an equivalently sized coil zipper, and more resistant to jamming from debris. Inside, there’s not an exposed fabric edge in sight—everything is taped and double-stitched. Flat mesh pockets on each side are useful for incidentals. For example, we have a 911SC with a compact spare you have to inflate in the event of a flat; I’m using one Lil Roy to hold the small compressor I carry for the purpose, plus the non-marring socket designed to prevent scratching the black paint on the Porsche’s fancy aluminum lug nuts. (Aluminum? Yes, really.)

Outside, the Lil Roy’s web handles wrap under the bag and, given the modest volume of this thing, would probably support it filled with material from the core of a neutron star. The self-locking zipper pulls are unlikely to come undone accidentally, but just in case, Red Oxx supplies a little steel cable with a screw fastener to keep them together. The metal dog tag on it, stamped with the company name and product information, could easily be replaced with another tag stamped with personal information. If not needed to lock the zippers it simply hangs off one of the handles.

Criticisms? Frankly, none that I could come up with. I don’t think the bag gains anything by having the zipper wrap so far down the sides, but that’s inconsequential. It’s not remotely waterproof, but it wasn’t intended to be. I’d like to see the Lil Roy offered in an additional version (Big Roy?) the same length and height, but twice the width—I’m thinking tire chains, jumper cables, like that.  

The biggest surprise of the Lil Roy is its $25 price. I don’t know how they can produce something of this quality in the U.S. for so little. The Lil Roy is available in 12 colors; I think most of us could find a use for every one.

The Red Oxx website is here


Proper backup lights for the JATAC - with remote control

$
0
0

Brilliant 19-watt Grote LED floodlamps are optional on the Four Wheel Camper. Could they serve a dual purpose?

The sealed-beam automotive headlamp was introduced in the U.S. in 1939. In 1940, the government embraced the technology and required every car sold in this country to be equipped with identical 7-inch diameter incandescent headlamps—and for the next four decades, time essentially stood still. Not until 1978 did the U.S. legalize the superior halogen design (which had been used in Europe since the 1960s). Only in the last 15 years have further real advances been made in automotive headlamp technology, first with HID units and now, increasingly, with LED designs.

Rather peculiarly, though, our reversing lamps still appear to be stuck in 1940.

While a few manufacturers have begun installing LED backup bulbs, most remain incandescent. None that I’ve seen of either type matches the output of an average cheap single-AA LED flashlight—and this is with an entire automotive electrical system available to power it. 

The situation is bad enough when you’re in a sedan trying to back out of a dark driveway without running over a pedestrian. It’s much, much worse if you find yourself too far down a narrow, rough four-wheel-drive route at night and need to turn around without going into the cactus or, somewhat worse, over the 50-foot cliff on the other side. I’m convinced not one Toyota, Land Rover, Jeep, or Mercedes engineer has ever been out testing a vehicle in the dark and found the need to engage reverse. Time after time in such a situation I’ve found myself trying to ride the brakes while doing so, because the brake lights are significantly brighter than the lights that are supposed to be showing me the way.

On my 1973 FJ40 I addressed the deficiency by installing a 50-watt Cibiè halogen fog lamp on the rear swing-away. Bam—problem solved. I can now reverse confidently out of a dicey situation without fear of making things worse.

Nice LED brake lights on the Tacoma . . .

Our 2012 Tacoma’s running light and brake bulbs are all efficient, durable, and bright LEDs. (The brake lights add a safety factor: LED’s activate about two-tenths of a second faster than incandescent bulbs. If that doesn’t seem like much, consider that at 40 mph the car following you will travel 12 feet in that time, which could easily mean the difference between a non-event or a neck brace.)

Where was I? Right: The Tacoma’s reversing lights. I knew from experience they were . . . adequate, but didn’t work any better than the ones on our 2000 Tacoma. I couldn’t see what type they were by looking through the faceted lens, so I pulled the lamp assembly and the bulb, and, yep . . . 1940. What gives, Toyota?

But what's with the cheap reversing bulb?

Ordinarily I would have gone online to look for upgraded bulbs, either a higher-wattage halogen replacement or an an LED conversion, although even this approach is somewhat limited by the stock reflector and lens. Other options include LED strips that mount on the license-plate frame (there are even compact HID reversing-bulb kits available with the potential to melt the plastic housing of the tail-lamp assembly). 

However, since we have a Four Wheel Camper on our truck, and since on that camper we ticked the option box for a pair of high-mounted Grote 19-watt LED flood lamps that light up an area behind us most easily measured in acres, an obvious solution presented itself. Thanks to a tip from another FWC owner, Michael Doyle, I ordered a Cyron RC2-12 remote switch kit off Amazon for $25. The kit includes two key-chain remotes and a control box just a couple inches on a side, and advertises a 100-foot range.

Given the low draw of the LED floodlamps and the protected location, I simply crimped the connections rather than soldering them.

I pulled the switch assembly for the floodlamps and simply Siamesed the power and delivery-side wires of the remote into the existing wires to and from the manual switch. Another wire from the control unit went to an existing ground screw in the battery compartment behind the switches, and the unit itself attached to another existing screw. Voilà—we can now create reversing daylight from the driver’s seat anytime we need it.

(I know what you’re thinking, and yes: This would be a formidable weapon against tailgaters. In fact I fear it would be too formidable. The sudden appearance of lights this blinding could very well send said tailgater off the road—or into oncoming traffic. Tempting though . . .)

The Cyron remote can be used to switch any number of things, and can, for example, obviate the need to run switch wiring into the cab for driving lights. However, for high-amp loads you’d want to connect it through a relay rather than directly.*

The compact control unit attached to an existing screw inside the camper's battery compartment. Grey wire on top is the antenna.

I’m still envisioning the perfect reversing lamp setup for a four-wheel-drive vehicle. Imagine a two-way system, with a properly bright light for urban driving and a switch that would activate extra-bright LED bulbs for use in the field. Sort of like the old city/country horn switch on the Jensen Interceptor of the 1970s, which activated a polite “toot” for urban use and an “out of my way” air blast for the country.

 Of course, it’s unknown whether anyone actually bothered to ever switch to the city horn mode. So c’mon, someone just give us some good stock reversing lamps . . .


*This year at the Overland Expo, Baja Designs will conduct a demonstration on current lighting systems, covering the latest advances in HID and LED technology. 

Quality . . .

$
0
0

I learned the hard way that the best equipment—and thus frequently the most expensive—almost invariably costs the least in the long run. 

I was eight or nine years old, and desperately craved a fishing rod and reel to use on a three-acre pond that existed improbably barely a mile from our house outside Tucson, Arizona. The pond was fed by Sabino Creek, and boasted a population of sunfish and largemouth bass—a miraculous opportunity for a desert kid addicted to magazines such as Field and Stream and Sports Afield, which seemed to focus almost entirely on bucolic Catskill trout streams and Minnesota lakes.

I had a job sweeping porches and cleaning the yards of empty new houses waiting to be sold in our sprawling rural neighborhood (50 cents per unit if memory serves), and was slowly saving for a beautiful Shakespeare open-face spinning reel and rod set on display at the Save-Co in town. Then my friend Bruce, always above me on the childhood income scale, showed up with a beautiful matched Mitchell/Garcia set. Rats, as we said then. Next trip to the store, the Shakespeare combination gleamed at me, still out of reach—but another set in a blister pack was priced exactly at the amount of cash I had, and half the figure on the Shakespeare tag. So I brought home a little push-button spincasting reel called a Compac BEARCAT and its five-foot fiberglass rod.

Sigh . . . Big mistake.

While Bruce’s Mitchell/Garcia reel and sturdy six-foot rod immediately went to work hauling in sunfish and bass for our pond-side campfire and Boy Scout frying pan, my pot-metal push-button alternative immediately went to work malfunctioning. A typical session would go like this: I wind up for a cast, flip the rod forward, and release the button to freespool the line. My lure zings away in an elegant arc toward the eagerly waiting fish—but then the spool cover of the reel detaches and flies off on its own tangent trajectory, taking a loop of line with it. This causes the lure to abruptly reverse its elegant arc and come whizzing back to embed itself in the tip guide of the rod with a thwack.

There were other issues with the reel, and within six months the rod had begun to delaminate and shed vicious little fiberglass splinters. I did manage to catch some fish with that miserable bit of equipment, but the fatal flaw in my impatient attempt at thrift jelled into a lesson that has stuck ever since. When I bought my first external-frame backpack a couple years later, I gritted my teeth and waited, ignored the cheapo stuff, and paid—what was it, $19.95?—for a Camp Trails pack and frame combination, which served yoeman’s duty for the next ten years until I switched to an internal-frame Gregory Snow Creek, again the top of the line at the time and again a faithful and durable piece of equipment—in fact I still have it and could easily rotate it back into use.

In the early 1980s I learned about a new outdoor equipment company called Marmot Mountain Works. They were pioneers in manufacturing Gore-Tex outerwear and sleeping bags, and produced only exceptional, U.S.-made gear—at wincingly exceptional prices*. Nevertheless, over the course of a couple of years I managed to invest in a Warm II Gore-Tex down parka, a bantamweight Gore-Tex goose-down sleeping bag called a Grouse, and an utterly bombproof three-hoop mountaineering tent called a Taku.

That was 30 years ago. I still have every one of those items, and still regularly use all but the tent (which is tight for a couple). The sleeping bag retains probably 90 percent of its original loft; the parka is still the warmest piece of clothing I own. (And that last bit brings up the other salient advantage to high-quality equipment: It doesn’t just last longer; it works better too. You don’t gain much even if your cheap gear lasts a long time if you have to put up with substandard performance in the meantime—you might find yourself wishing it would wear out.) My amortized cost for that parka and sleeping bag must be literally pennies per use.

Thus, despite a penurious career as a freelance writer, I’ve remained faithful to the Church of Good Equipment, whether it be fishing rods, vehicles, or anything in between. Very frequently this has meant waiting for things I wanted right now, or buying used when I wanted shiny and new, and it’s always meant choosing priorities rather than buying every expensive item that strikes my fancy like some Robb Report subscriber. I’m reminded of the clueless interviewer who asked fishing writer John Gierach how a guy with a leaky roof and a 20-year-old truck in need of a valve job could afford a collection of vintage split-cane fly rods. Gierach just looked at the guy and said, “Isn’t it obvious?” Whenever anyone hints that I have more money than I let on, I point to our own cottage in the desert, which encloses a full 350 square feet under its (non-leaking) roof. We have more cover for our vehicles and equipment than we do for ourselves. That’s my kind of prioritizing—fortunately I’m blessed with a wife who agrees.

We’re lucky—not everyone can make such clear-cut choices in today’s world. Raising a family, in particular, creates overreaching priorities that push all others to the rear. Nevertheless, no matter what your circumstances, I’ll always maintain that defaulting to higher quality will save you money—and potentially a lot of grief—in the long run.

Especially if you live near a bass pond.


*Sadly, not any more. Like so many other such makers (including Camp Trails and Gregory), Marmot was sold off by its founder and now produces products offshore. Much of it is still good stuff, but . . . not the same.    

More good stuff from Lifeproof

$
0
0

I’m not as technologically averse as all my friends and family like to joke. In fact, I pioneered the switch to Mac computers in our household in 2003, and managed to learn the new operating system pretty much on my own. Digital cameras? I was all over them once the images reached publishable resolution.

However, I will admit to a fierce, abiding loathing for the telephone, or, to be specific, talking on the telephone. For me it’s always been a tool for dispensing or receiving important information as quickly as possible, not for leisurely chats. There are few phone conversations I can’t get through using artful combinations of “Yes,” and “No,” occasionally spiced with “Sure,” or “Probably not,” including calls home to my wife after two weeks incommunicado in Zambia. Any interchange that goes over 30 seconds and my fingers start tapping, my pupils dilate, and a high-pitched keening sound becomes noticeable to the person on the other end. The torture scene in Zero Dark Thirty? Calls from my mother were worse.

And that’s why—until recently—a $19 flip-phone was all the phone I needed. I’d point over the counter at the Verizon store and ask, “Can that one in the back make calls?” If the answer was, “Well, sure, but . . .”—sold.

Then telephones started doing more than annoying me, because they started doing more than ringing. First they added GPS—astonishing enough—but then came apps and Google Maps, and suddenly on road trips Roseann could tap her iPhone and find the best coffee or café in any town on our route in seconds. No more fishing down side streets, gambling on local diners, or settling for anodyne chains. The facility made road trips far more enjoyable, and probably saved enough time to add a hundred miles to the distance we could cover in a day.

There was more, such as the level and tilt app that allowed us to precisely measure the angles of slip faces on dunes in Egypt’s sand seas. And the utterly magic Star Walk, which recently informed us that the bright satellite passing over our camp in the desert at dusk was in fact the International Space Station. And the National Geographic North American Bird Guide, which includes a complete audio section on calls and songs.

So . . . sigh . . . after losing my most recent throwaway phone somewhere in Africa, I became the owner of an iPhone 5—and, not ten minutes after regaining normal heart rhythm from sticker shock, learned about accessories. I remember when the only accessory for a phone was the rubber banana-shaped thing you stuck to the handset so you could hold it with your shoulder. Not anymore.

First addition was a Lifeproof case. And a fine addition it was, considering that for the last decade I’ve been used to treating my $19 phone like . . . a $19 phone. No need to walk clear across the room to put it on my desk—a simple toss gets it there quicker. Not a good idea with a zillion-dollar miniature computer/phone/camera/GPS thing, but old habits die hard. So the shock-resistant, waterproof Lifeproof case gives me peace of mind. Furthermore, it vastly improves my grip on the phone, which when nude had an unsettling orange-seed squirtiness about it, like it could fly out of my grasp on its own. It necessitates a slightly firmer tap to use the touch-screen, but not much, and since I do not text, facile typing is unnecessary. I note that Roseann, who frequently answers business emails on her iPhone while I’m driving, doesn’t seem to have a problem.

Most recently we received one of Lifeproof’s suction-cup vehicle mounts. It can attach to the windshield, but the kit includes a disk with adhesive backing you can stick elsewhere on the dash if you don’t want the unit in your line of sight of the road. We attached the disk to the passenger side of the center console, clipped in the phone, and left for a weekend trip along southern Arizona’s Camino del Diablo, which sports miles and miles of punishing washboard (or corrugations as the rest of the world knows them), especially along the Christmas Pass exit road to I-8. The iPhone on its mount remained astoundingly vibration-free throughout the trip, and Roseann had no trouble tapping in navigation commands without the need to support the unit from behind. It’s a solid system, and well worth its $40. Of course it’s sized to take the iPhone only if it’s inside a Lifeproof case, and we’d need another model for Roseann’s slightly smaller iPhone 4S (it fits but not as securely). But I suspect if they made it one-size-fits-all the rigidity would suffer, so I won’t complain.


I recall how thrilled I was with our old Garmin 276 GPS and its bulky, jiggly windshield suction mount. Just five years later we have a device that does ten times more at a fifth the weight, and a mount that renders it as steady and accessible as if it were another dashboard gauge. 

Isn’t technology wonderful?   

Three days on El Camino del Diablo

$
0
0

Few places on earth have experienced such a completely circular human history as the desert traversed by southern Arizona’s El Camino del Diablo. In the 17th, 18th, and 19th centuries its harsh plains and jagged mountains comprised a gauntlet for missionaries, explorers, and seekers of gold traveling northwest from Caborca to the first sure water at the Colorado River. In the late 20th and early 21st centuries it became another gauntlet, this time for illegal immigrants from Mexico and Central America trekking north seeking the gold of employment in the U.S. The tally of deaths from either period is impossible to pin down, but likely very similar. Some say each is in the hundreds.

Yet like many landscapes that have witnessed human tragedy, the magnificence of this corner of the Sonoran Desert transcends the strivings and failings of the bipedal creatures that scratch its surface. Here is a region where temperatures in summer regularly exceed 115 degrees Fahrenheit, yet where biological diversity is higher than in the pine-clad Rocky Mountains. Here lives a species of fish—found in just one spring-fed pond—that can survive water temperatures of 95 degrees and salinity higher than the ocean. The bighorn sheep that look down from the cliffs can lose 30 percent of their body weight to dehydration and survive with no ill effects. Within multi-holed mounds on the desert floor is a small rodent, the kangaroo rat, that never drinks or even needs to eat moist vegetation. It manufactures its own water from the carbohydrates in the dry seeds that comprise its entire diet. When winter rains are plentiful—meaning a few inches—the desert floor explodes in spring with a show of wildflowers to rival any English meadow. And always, always, the open space gives new room to lungs constricted by city living, and sharper vision to eyes clouded by concrete horizons.

Click for larger view.

I first traversed "The Road of the Devil" in the sultry August of 1979, alone in my FJ40. In a week I saw not another soul—as far as I know, I had a million acres all to myself. That has changed, and although the Cabeza Prieta National Wildlife Refuge and the Barry Goldwater Air force Range, through which the road passes, remain remote and rugged, the U.S. Border Patrol now maintains a persistent presence, with two F.O.B.s (forward operating bases) plonked down surreally in the desert, and constant patrols. Before you can get a permit as a new visitor, you’re required to watch a 15-minute video and sign off on a hold-harmless form detailing at least 27 ways a stupid person could get hurt or be blown to smithereens in the area.

It’s worth it. The landscape along the main road from Ajo south and west through a corner of the Organ Pipe Cactus National Monument, across the Growler and Mohawk Valleys and the Tule Desert, is breathtaking, and changes with each pass through the mountain ranges—some dark, some light, some weirdly striped—that angle northwest/southeast through the refuge. The soft peach Pinta Sands dunes stand out in contrast to the surrounding lava fields, and improbable stretches of tightly overhanging mesquite trees mark the courses of washes that turn the road into impassible muck during summer thunderstorms.

The entire center section of the Camino is closed to public use from March 15 to July 15 to minimize disturbance to the secretive and endangered Sonoran pronghorn during fawning season—although the impact of the Border Patrol and migrants must be far greater than that of the few tourists who still brave the route. But if you wish, you can still drive in to the spectacular Tinajas Altas tanks from the west. 

We beat the closure and spent a too-short weekend driving from Ajo to Tule Well, then north through Christmas Pass to Interstate 8. While some parts of the road are rough, and there are miles of corrugations north of Christmas Pass, we could have done the trip easily in a two-wheel-drive truck—or a sedan—in these conditions. West of Tule there are sections of bulldust that would challenge a low-clearance vehicle, however.

A four-wheel-drive Tacoma is almost overkill on El Camino. We're doing our best to abuse the stock street tires that came with the truck before mounting some all-terrain rubber.Our first camp was at Papago Well, where a relief station and emergency beacon set up for migrants is marked with a blue flag. Marisa stands amid the Pinacate lava flow, the northernmost extension of the Pinacate volcanic region. Near here is also the northernmost extension of the Altar dune field, called the Pinta Sands.Looking down on Tule Well and the campsite (one of four on the refuge). The little cabin was built in 1989, replacing an earlier structure. A log book is inside for visitors to sign.Tule cabin is open and available for anyone to use if needed. There's even a small fireplace in the corner.

Boy Scout troops erected this monument on the hill overlooking tule Well.

Campfires are permitted, but you must bring your own wood. We also used a sturdy Snow Peak Pack & Carry fireplace.Dawn from Tule Camp. Mockingbirds and Phainopeplas were getting ready to breed, and singing.Heading north through Christmas Pass, affording a fine view of our ultra-low-profile Global Solar photovoltaic panels, which provide the Four Wheel Camper with a surfeit of power.Under a cloudy sky we headed north toward I-8, past this enormous ironwood tree.Lots of unexploded ordnance on the Barry M. Goldwater range. This fin could be a piece, or there could be an entire missile under there. Do we pull on it?Federal law states that it illegal to visit the Cabeza Prieta without stopping at Dateland afterwards for a zillion-calorie date shake. Well, if it's not illegal, it should be. Support local business!

If you go: The refuge headquarters and visitors' center is in Ajo, on the road north out of (or into) town (Monday through Friday 8:00 to 4:00). You're required to obtain a free permit to enter the refuge, and will also need to register at a kiosk on the refuge border. The roads through the refuge are easily traversed, but a sturdy vehicle is recommended. You could drive the length in a day if you really wanted to, but it would be a wasted journey not to slow down and experience the scenery and wildlife. 

Take plenty of water—there are no reliable sources on the refuge, and what's there is needed for wildlife. Take enough to ensure you could walk out to the nearest highway if necessary; don't count on a Border Patrol agent coming along to rescue you.

A fine book on the Camino del Diablo is Sunshot, by Bill Broyles. 

View our entire collection of trip photos on Flickr, here, and our video highlights, below.

Irreducible imperfection: the SOL Origin

$
0
0

Manufacturing miniature survival kits must be the closest thing to printing your own money short of selling bottled water. I’ve looked at dozens of them, and rarely found contents worth more than about $2.95—usually some fish hooks and monofilament, a few feet of cheap paracord, matches or friction fire starter, a button compass, and a couple of safety pins. Maybe a tiny mirror for signaling. For a while many of them came with a condom, the stated purpose of which was not to provide safe sex with that drooling grizzly bear loping in your direction, but to carry water. Right.

I’ve recently been evaluating the SOL Origin survival kit, which retails for around $40, and I must say the contents of this kit are a step up from some. In fact, I’d say there’s a good six or seven bucks worth of stuff in here. 

SOL stands for Survive Outdoors Longer (as well as the banal double entendre). SOL is a division of the parent company that owns Adventure Medical Kits, which I’ll say up front produces some of the very finest expedition first-aid kits, one of which is standard equipment on all our African projects. 

The SOL Origin comprises an ABS plastic case enclosing the following: 

  • Three square feet of aluminum foil—sorry, heavy-duty aluminum foil according to SOL 
  • A combination knife, LED flashlight, and whistle
  • A liquid-filled button compass
  • A “Fire Lite” thumb-wheel fire striker
  • Four #10 fish hooks
  • Fishing line
  • Six feet of .020” stainless-steel wire
  • Signal mirror
  • Two snap swivels
  • Two split-shot line weights
  • Four pieces of braided “Tinder Quick”
  • Sewing needle
  • Ten feet of 150-pound-test braided nylon cord

Okay—maybe I was wrong about the six or seven bucks worth of contents. Let’s make it five.

So, what do we have here? I’ll start with the palm-sized case, which for some strange reason comes with a wrist lanyard, as though that’s how you’d carry it around ready for deployment the instant you felt disoriented. The case is constructed in such a way that the knife/flashlight/whistle, the fire striker, and the button compass slide into slots on the outside. This accomplishes several nifty things at once. It increases the chance one or more of those items (the most critical in the kit) will be damaged or come loose and be lost; it severely reduces the internal volume of the case, rendering it unusable for, say, scooping water out of a crevice or digging; and it makes the device look much more tactical, meaning the maker can charge more than if they gave you a simple metal box that could also be used for cooking or boiling water.

You hope they don't come out of their own volition. The LED bulb is visible at the base of the knife blade; whistle on the other end. Battery compartment is under the "SOL" lettering.

The button compass is simple, well-dampened, and seems to work just fine. Since most people who become lost know more or less in which cardinal direction civilization (or at least the road) lies, it could be a useful tool. There’s a little thumbnail slot in it to facilitate removing it from the case; if this had been pushed through all the way you’d have the option of hanging the compass around your neck on a cord. You could easily drill it out.

The knife blade is 1 3/4 inches long, made from actually-not-bad AUS-8 stainless steel, and is quite sharp. It opens with a right-handed thumb stud, and even locks with a simple Walker liner lock—at least, it’s supposed to. I found that light finger pressure easily overpowered the lock. Best to pretend it’s not there rather than count on it to prevent getting cut. The blade flexes back and forth rather alarmingly on its pivot. The knife would be perfectly functional for gutting a trout or making feather sticks to start a fire, but for anything beyond that—building a shelter, for example—it’s worthless (and I think many so-called survival knives are far too large). The tiny LED flashlight casts a decent keychain-light-level glow and is supposed to shine for 15 hours. There is room in the case for a spare pair of button batteries (which you’d have to buy on your own). But the battery compartment is secured with a tiny Phillips-head screw, so unless you have the means to remove that . . .

The flashlight bulb shines along the axis of the knife, which sort of helps you see what you’re cutting, but it’s not nearly as effective—or as bright—as a separate flashlight would be, even one powered by a single AA battery. 

The whistle opposite the knife blade is loud. Just don’t get distracted if you spot a would-be rescuer while whittling a tent peg or something, and stick the wrong end in your mouth.

Lit - finally - but not much of a flame.

Next is the fire striker, to be used in conjunction with the four, inch-long bits of braided tinder inside, which appear to be infused with paraffin or something similar. Since, in many if not most survival scenarios, fire is your single most vital survival and signaling (not to mention psychological) tool, one would expect care to be taken here. The striker is said to produce up to 5,000 sparks, but—and this is assuming the thing hasn’t come out of its slot and disappeared—the sparks it generates are nothing like the shower produced by a proper magnesium stick. I tried it on one of the pieces of tinder, and it took me two minutes of repeated striking to finally get the cord lit, after which it burned with the strength of a large candle for a bit over two minutes, showing very little resistance to the light breeze that was blowing at the time. I literally used up a hundred or more of those 5,000 sparks to light a manufactured bit of tinder. I wouldn’t even try it on natural tinder. Could the cord have dried out during the time this kit sat on a shelf? Not good if so.

Last on the exterior list is the polycarbonate signal mirror, which hinges off the lid and thus at least can’t be lost easily. The aiming hole in the center of the mirror incorporates retro-reflective mesh, a material that allows extremely accurate aiming. The fold-out “survival pamphlet” in the case includes clear instructions on how to use it—which is lucky, because the graphic under the mirror is utterly incomprehensible. Nevertheless, the mirror is adequately sized and bright, protected from scratching, and undoubtedly the best implement in the kit.

The signal mirror is a good one, but don't try to figure out how to use it from the graphic.

On to the inside contents. First, the “three square feet” of “heavy-duty” aluminum foil. At 5.5 by 11.5 inches, their math is a bit off, at least for the piece in my kit. My arithmetic comes up with slightly less than half a square foot. Second, I’ve encountered heavier foil wrapped around a stick of Juicy Fruit—this piece came pre-holed on one of the folds. Finally, even the makers seem unsure what to do with the stuff. The pamphlet says, under “Improvisation,” that it “can be used as a reflective device for signaling.” Isn’t the mirror better for that? Another suggested use is as “ . . . a head covering when the night comes on cold.” Okaaaay. So I tried it. I felt like a stick of Juicy Fruit.

The author, contemplating actually facing the wilderness with this stuff.

Onward. Ten feet of braided nylon is perhaps enough to string between two trees to support a poncho or Space Blanket for a shelter. Or you could lash your 1 3/4-inch SOL knife to a stick and go hunting for . . . well . . . chipmunks, perhaps. Or meadowlarks. Twenty feet would have been better, and 20 feet of 550 paracord even better.

Safety pins. Three of them. I want to know: HAS ANYONE IN RECORDED HISTORY EVER NEEDED A SAFETY PIN IN A SURVIVAL SITUATION? 

A sewing needle. So you can keep your survival duds neatly mended, or suture the gashes you sustained when that grizzly bear tried to . . . never mind.

Four #10 fish hooks, snap swivels, split shot, and monofilament line. A fine addition to the kit, given the right circumstances of course. In fact, I would have preferred more hooks in different sizes, and more line. The company’s site doesn’t specify the test of the included line, but it appears to be more than adequate for the hook size. It’s up to you to figure out out to crimp the split shot on the line. It’s also up to you to know the proper fisherman’s knot that will secure the slippery monofilament line to the snap swivels; the pamphlet includes none.

 Six feet of snare wire (okay, they call it “safety wire,” but the pamphlet suggests using it for snaring). Another fine idea in theory. With a bit of training—and as with the fish hooks, the right habitat—snaring small mammals is a viable survival technique that requires minimal materials and minimal energy expenditure. However, the wire in the SOL Origin was so completely useless for this purpose as to be laughable if the company weren’t touting it as a life-saving device. It was so springy that even after concerted effort I could not straighten it enough to form a stable loop, yet it also kinked horribly. Finally, while holding one end down with a boot and pulling on the other end to try to straighten it, the wire simply snapped at one of the kinks. Not good. Even if the wire were suitable, you need multiple snares to ensure success, and six feet is not enough. 

The worthless- and broken - "safety wire" from the SOL Origin in the middle, with a professionally made wire snare capable of taking small game.

Thankfully, that was the last item in the kit, because by this point I was shaking my head in disbelief that the SOL Origin had ever reached the market in this form.

Let’s stop to postulate here. You’re lost in the wilderness. You have no vehicle, no means of communication. Depending on environmental conditions, the next 48 hours will determine whether you live or die. Do you really want to pin your future on a two-inch knife, a plastic spark generator, and some Reynolds Wrap?

Oddly, the kit’s pamphlet (written by Buck Tilton, who should know what he’s talking about, and who calls this “the best little survival kit in the world”) properly identifies survival priorities: positive attitude, medical care, shelter/fire, signaling, water, and food. The SOL Origin fails to address medical care and water at all (not even a few iodine tablets included), is marginal at best on food (worthless snare wire and adequate fishing supplies), and is poor on fire/shelter (build a lean-to with that knife?). Daytime signaling is the only facet that achieves good marks. 

I’d even give it a fail on engendering a positive attitude. Given that up to half or more of your time spent lost is going to be at night, with all the attendant practical and psychological implications, the failure to include a proper flashlight is a strong hint that this kit was designed by a designer, not anyone with experience in survival situations.

I could go on to rant about the pamphlet too, but I won’t. Okay, just one: Water. Buck tells us, among other gems, that “ants” mean water is not too far away. I can show Buck lots of ants that don’t live within 50 miles of water. Also, “Birds, especially grain-eating birds, fly to water at dawn and dusk.” Buck, the operative word there is “fly.” And finally he repeats the old saw about “digging at the bends of dry washes.” The only thing you’ll wind up with eleven months of the year if you try that where I live is a pre-excavated grave. 

The concept of a palm-sized survival kit is interesting, and I suppose one could argue that the SOL kit is better than nothing at all. But it would be absurdly easy to put together a kit taking up little if any more space, which would be infinitely more useful for saving your life. Yes, it would cost more—if you don’t think your life is worth more than a nice lunch out, I have an SOL Origin I’ll part with for a pittance. As it is, if I somehow found myself caught out with this thing in a survival situation, my first thought would be:

Man, I am SOL.

Unfortunately, Buck won't be there when you need him. 

The one-case tool kit, part 4

$
0
0


(Please read part 1 here, part 2 here, and part 3 here)

I've finally wrapped up my project to assemble a comprehensive one-case field tool kit—and I’m really glad I restricted myself to a Pelican 1550. 

It’s absolutely axiomatic when assembling a tool kit that it will expand to fit the available space, and it would have been effortless to fill a much larger container with Oh-I-should-have-this items, to the point where any notion of portability went out the window. As it is, the case and contents had nudged above 55 pounds by the time I was satisfied.


But after over a year of playing stump-the-tool-kit, I have yet to come across a task the contents couldn’t handle. It’s been employed successfully for jobs ranging from repairing a Honda generator in Mexico’s Sierra Madre (used, critically, to power UV lights for an insect survey) to replacing the dreaded trap oxidizer on our old Mercedes 300D at home (which incidentally resulted in a good 20 percent power increase). One fiendishly positioned nut on that device eventually required the Snap-on 18-inch ratchet, two extensions, a universal joint, and a socket to access—all there in the case. The closest I came to being stymied was removing the 10mm allen-head bolts on a Porsche 911SC anti-roll bar. The swiveling allen key in the kit baaarely got those loose; I’ve decided to add a set of 1/2-inch-drive allen-head sockets, which will take up scant room.

So: What’s in it? Here is the complete list (see previous installments for the justification for each): 

  • Britool 748267 3/8ths-inch socket/ratchet set (1/4” to 1” SAE sockets; 6mm to 24mm metric sockets, Torx sockets T8 to T16, assorted driver bits)
  • Facom S.200 DP 1/2-inch socket/ratchet set (10mm to 32mm metric sockets)
  • Snap-on SX80A 18-inch flex-head ratchet
  • 1 1/2-pound sledge-head hammer
  • Craftsman replaceable-head soft-faced hammer
  • Combination wrenches (7mm to 25mm plus 27 and 30)
  • Facom torque converter
  • Facom Pro-Twist Shock screwdriver set
  • Assorted Craftsman screwdrivers including stubbies
  • Snap-on replaceable-bit ratcheting driver
  • Brass drift
  • Three cold chisels
  • Two punches
  • Small pry bar
  • Knipex and Channel-Lock pliers
  • Two pairs needle-nosed pliers
  • Vise-Grip pliers
  • Small self-adjusting plier
  • Side cutter
  • Electrical stripping/crimping tool
  • Hemostats
  • Six-inch adjustable wrench
  • Three snap-ring pliers
  • Adjustable hacksaw
  • Combination flat/half-round file
  • Round file
  • Tin snips
  • Two LED flashlights
  • Box cutter
  • Spark-plug puller
  • Radiator-hose pick
  • Feeler gauges
  • Power Probe voltage/resistance tester
  • Continuity tester
  • Swiveling hex-key set
  • Small wire brush
  • Mechanic’s gloves
  • Tube of hand cleaner
  • Safety glasses

So—while the selection is meager compared to what I have available in the rollaway chest in the shop, even I, who had high hopes, have been surprised at how effective it is. Yes, if I need a hammer at home I can choose among nine or ten to get exactly the right weight and head, while in the case I must make do with two—but so far I’ve been able to make do nicely.

Believe it or not, there’s a bit of room left over in the Pelican. If I were to embark on a really long journey, I could still fit in, say, a hand drill and bits, a pickle fork to separate ball joints, a hub socket to fit the Land Cruiser, and a couple other more obscure items.

I don’t consider this selection definitive. I have absolutely no doubt that sooner or later I’ll run into a situation I can’t handle (although I’d allow myself a pass on true special tools required for certain specific tasks on many vehicles). But for now I’m convinced I have put together a pretty good one-case tool kit. Is it "The Ultimate One-case Tool Kit?" I guess that's open to a challenge . . .

At the Overland Expo, May 17-19 2013, I'll be demonstrating the one-case tool kit for Overland Experience package holders on Friday at 2:00 PM and Saturday at 4:00 PM. Overland Experience attendees can also attend my class on assembling a basic tool kit, Friday at 1:00 PM and Saturday at 3:00 PM. Find out more about the Overland Expo HERE. 

Kaufmann Mercantile

$
0
0

My first encounter with Kaufmann Mercantile was nearly my last. 

A friend sent me a link to a page on their site that featured a slingshot. Cool—except this slingshot was made from the natural fork of a buckthorn tree branch, its air of Tom Sawyer Americana yours for $21.

What

No one buys a treefork slingshot, I spluttered. A treefork slingshot is something you make yourself when you’re 10 years old, using a cut-up bicycle inner tube as propulsion. I made one, and used it to essentially random effect before discovering the relative deadliness of the Trumark Wrist Rocket*. 

I nearly clicked off the site, but some sort of morbid curiosity induced me to read further. Turns out the buckthorn is an invasive species in Minnesota, and the trees are regularly cut down to stumps by community service groups. A fellow named Bill Pine makes slingshots from the offcuts.

Well . . . okay. I still was of the opinion that red-blooded kids should make their own damn slingshots, but at least the philosophy behind these was commendable. So I forced myself to look beyond the nearby “handmade wooden rope swings” (don’t get me started . . .)—and wound up spending a good half hour browsing through a fascinating hodgepodge of high-quality odds and ends, from sturdy wire crates built in a century-old factory in Texas, to handmade ceramic growlers, to riveted aluminum lunch boxes from Canada, to Sheffield-made cabinet-maker’s screwdrivers (or should I say “turnscrews”). I could have dropped a thousand bucks effortlessly in that time—yet, unlike so many twee boutique online catalogs, the Kaufmann site also had loads of interesting items under $20. Clearly the founder of the company, Sebastian Kaufmann, wasn’t just interested in expensive stuff; he simply liked good stuff, especially if it’s unique.

So . . . sigh . . . now I’m on Kaufmann’s insidious emailing list, and rarely a week goes by without some temptation.

Recently I had them send me a couple of intriguing items: a pair of elkskin work gloves with, unusually, the smooth, outer side of the leather turned in, and a so-called EDC (Every-Day Carry) keychain kit, about which more in a minute.

The gloves are made in Centralia, Washington, by a company called Geier, who’ve been doing it since 1927. Like deerskin, elkskin is soft and somewhat elastic, but considerably thicker and more durable. Most significantly, turning the smooth outer surface of the leather inside creates what is simply the most comfortable work glove I’ve ever used, and I go through a lot of gloves where we live. Ordinary full-grain cow-leather gloves, with the rough surface in, can become work-hardened—especially if they’ve gotten wet during use—and offer less than perfect protection against friction. The Geier/Kaufmann gloves should stay pliable until worn completely through. They can even be washed safely with soap and warm water.

I used them for some Hi-Lift jack demonstration, and also for shoveling and pick work. In both situations the feel of the tool through the glove was excellent—critical for safe operation, particularly on the jack—but I could feel no hot spots whatsoever through the slightly springy leather. The suede exterior surface is grippy enough so I didn’t need to squeeze unduly hard to maintain a safe hold.

I did find one contra-indicated use: The suede is not as resistant as smooth leather to constant friction, for example when respooling winch line (even synthetic). I’d recommend either the smooth-out Geier elkskin glove or one of their cowhide (or bison!) gloves for such use.

Alexis at Kaufmann also suggested I try one of their EDC keychain kits, and what an immediately useful trinket that turned out to be. It comprises a mini pry bar, one standard and one phillips screwdriver, an Uncle Bill’s precision tweezer in a little clip, and a curious little stainless-steel lozenge that looks like it could be a container for medication.

I used the mini pry bar within days for removing paint can lids and those nasty big staples that secure shipping boxes. The screwdrivers take a surprising amount of torque if you use the keychain as a grip and lever—I removed door-hinge screws as an experiment, with no trouble. The tweezer: I live in cactus country, ‘nuff said.

And the lozenge? Unscrew it, and it reveals what I have to say is the cutest lighter I’ve ever seen. It takes standard lighter fuel, has an O-ring to prevent fluid getting out and water getting in, and lights every time. The one caution is, you don’t want to leave it burning for more than about 15 seconds, or the whole thing gets alarmingly hot.

Looking at the lighter, I was reminded of the spark generator in the SOL Origin survival kit (reviewed HERE), with which I was less than impressed. Aside from the fact that it was billed as something that could save your life, it was also described as waterproof—a claim I hadn’t tested. I wondered how the survival tool would stack up against this little trifle of a lighter, so I dunked them both in a glass of water for 15 minutes. Afterwards, the “survival tool” would barely produce a flicker of a spark—I might have been able to ignite a bucket of gasoline, but natural tinder? Forget it. The little lighter, on the other hand, fired right up. Drop me in the middle of the forest and there’s no question which of these I’d rather have with me. As with the other items in the EDC kit, it’s available separately, and I can think of places to keep two or three of them handy. (The pry bar too is especially useful as a keychain accessory—it prevents you from pressing your Swiss Army Knife's screwdriver into tasks for which it was not designed.)

Kaufmann Mercantile is HERE, but I absolve myself of responsibility for the consequences if you go.

*New York state apparently finds them too deadly: wrist-braced slingshots are illegal there. I am not making this up.


Lifeproof's Total Water Protection Program

$
0
0

Since being seduced into the world of phones that cost more than lunch, I've come to count on the peace of mind afforded by the Lifeproof case I got for my iPhone 5. It adds shock resistance, protection against rain or even dunking, and a much more secure grip on the phone—the last of which which lessens the chance that you'll need the first two.

Now Lifeproof is adding even more peace of mind with their Total Water Protection Program, a guarantee that as far as I'm aware is the first of its kind. For one year you get free one-time repair or replacement of your iPhone or iPad if it sustains accidental water damage while in a Lifeproof case. That's a pretty bold step, and an indication of the confidence the company has in the product.

It's particularly impressive given how compact and unobtrusive the Lifeproof case is to begin with. Within a few days I'd forgotten my phone was even enclosed, and I have no trouble at all operating the phone through the screen. 

For more information, see the Lifeproof website HERE

An update for the Safe Jack

$
0
0

If you've read THIS entry, you know I was impressed by the Safe Jack stabilizer for the Hi-Lift Jack. In many scenarios it vastly increases the utility and safety of the Hi-Lift, and the base plate on its own makes a fine replacement for the old orange plastic ORB base in soft sand or mud.

I've been using the tool for a couple months now, and remain impressed. However, like almost any new product, I noticed potential for improvement. The design of the upper clevis precluded the jack's handle from resting against the standard, so the spring clip that holds the handle vertical when the jack is unattended would not engage. (I've been carrying a strip of One-Wrap Velcro to secure the handle when needed.) The clevis also limited somewhat the upper travel of the jack's foot.

Apparently Richard Bogert of Bogert Engineering noticed the same issues, because he recently sent me a redesigned upper clevis. The new piece now attaches to the front of the standard rather than the rear, and the eyebolt tensioner is gone. This increases travel, and allows the handle to touch the standard, engaging the spring clip. A new clevis pin with a wire latch simplifies attachment, and two side-mounted wing nuts adjust tension if necessary. The new piece even saves weight compared to the old one, and on the front face is a section of UHMW polyethylene to protect the vehicle should the tool come into contact with it.

If you own a Safe Jack with the original clevis, Bogert will send you the updated version for fifteen bucks. That's barely more than postage alone would cost. Of course new Safe Jacks will all be equipped with the updated part.

It's an excellent upgrade, and makes a good tool even better. Production should be underway within a week; check with Bogert Engineering HERE

A Hi-Lift jack mount for the JATAC

$
0
0

The Hi-Lift jack is a useful tool, but it’s also a pain to carry securely on a vehicle, especially if you want to keep it reasonably accessible. I’ve seen many mounts that achieved one but not the other—and too often, safety loses out to convenience. Sadly I had neither a camera nor a cell phone with me a few years ago when I spotted a Hi-Lift mounted horizontally on top of a bull bar on a truck, just above hood level—and secured with a pair of tightly wrapped bungee cords. The imagery of what could happen if that truck were smartly rear-ended was . . . colorful, not to mention what could happen to an innocent person if Mr. Thatoughttaholdit rear-ended someone else. For reference, a 30-pound Hi-Lift mounted on a vehicle that comes to an abrupt halt from 30 mph exerts a force of 903 foot-pounds of energy on whatever is holding it to that vehicle.  

I see a lot of Hi-Lifts bolted to roof racks—secure, safe but for the modest impact on CG, and more likely to stay free of road grime, which can quickly foul the Hi-Lift’s mechanism. It’s not a bad spot if you can access it without climbing. Also good are dedicated mounts on rear tire carriers (as opposed to the ones that bolt behind the spare tire, which are a pain). I suppose a properly engineered mount atop a bull bar is okay; it’s certainly handy there. But I’ve never seen one that didn’t impede forward vision and access to the engine compartment. And on a strictly personal note, it looks just a little too, well, Moaby, if I may coin a word. 

Mounting a Hi-Lift on the JATAC presented its own challenges. The roof is out of reach and devoted to solar panels. We’ll be installing a Hi-Lift-compatible winch bumper up front soon, but that was rejected for the reasons stated above. And we’ve also decided not to install a rear bumper with big swingaways, to hold down mass at the back of the vehicle. What did that leave us?

I asked Tom Hanagan at Four Wheel Campers about fabricating a mount that would bolt to the rear wall of the camper, directly through the vertical aluminum frame members, to hold the jack vertically to the right of the door. He thought it could work, but was hesitant to sanction the idea unequivocally. And that location would still hang the mass off the back of the vehicle.

Then, while walking around the truck stroking my chin and pondering, I noticed the area where the camper overhangs the truck’s bed on each side. I held up a Hi-Lift to the spot, and it tucked in as though designed to ride there. The location would be completely out of the way yet quickly accessed, and while the weight would still be toward the back, it was significantly forward of a rear wall mount. I decided to mount it on the passenger side, to compensate for the weight of the truck’s fuel tank and the camper’s water heater, both of which are on the driver’s side.

I used two short lengths of two-inch-square steel tube for the brackets. First I located the spots I’d drill through to hang the brackets—one in the propane tank compartment, one behind the fridge inside the camper. I used two 1/4-inch grade 8 bolts with fender washers to anchor each bracket through the plywood (which fortuitously is double thickness in the propane compartment, where the heaviest part of the jack would be). To secure the jack to the brackets, I used a 3/8ths-inch grade 8 bolt on each one. The bolt was too long to slide into the tube and down through the hole I drilled, so I drilled an adjacent hole and made a slot to get the bolt through. I tack-welded each bolt in place, and welded a short piece of thicker steel under each bolt as reinforcement. On the rear mount I extended the reinforcing strip forward and drilled a hole through it, to secure a padlock through the mount and the standard of the jack.

Positioning the mounts laterally was tricky. I wanted the jack tucked all the way under the camper, but needed clearance to drop it free of the mounting bolts without scraping the sheet metal of the truck’s bed. With a bit of winkling, I got them just about right. One needs to be cautious and not just yank the jack free; it must be twisted slightly to get in or out without hitting the lifting mechanism on the back of the bed, but it’s easy to do single-handed. To secure the jack to the bracket I use a grade 8 nut to hold the weight, and a nylock wingnut to keep it snug.

 The next issue was to ensure the jack’s operating handle stayed secure while driving. I have a stock rubber handle keeper, which slides over the handle and the standard, but it can migrate when subjected to vibration. So I fabricated a modified version from some half-inch-thick polyethylene I had around, and cut two polyethylene pieces that lock the keeper in place via a spring clevis pin. Done.

With the jack’s base plate in place, the right turn signal is just slightly obscured from above and behind the truck. It would only be an issue if someone in a semi was close behind us, but we’ll keep the base plate in our recovery kit anyway, and thus avoid potential legal issues as well. With that gone, one needs to be absolutely certain that the selecting lever of the jack is in the “lift” position, otherwise the entire lifting mechanism could migrate off the back of the standard while driving (or be propelled off it in an accident). Not good. I’ll use some sort of secondary arrangement as backup, likely a short bolt and wing nut. (Note here: A Hi-Lift should always be stored with the lever in the lift position anyway.)

So far the arrangement works perfectly. The jack is totally out of the way, yet easy to retrieve. In terms of safety, the mount should be secure through any but the most catastrophic impact: The force applied by the brackets to the floor of the camper would be in sheer; with four grade 8 bolts securing the assembly I’m sanguine. 

Next task: to mount a front bumper on the JATAC that will properly accept a Hi-Lift jack for recovery purposes.


A compressor for the Boss air bags

$
0
0


The bottom switch adds air to both bags simultaneously. The two buttons above bleed air individually to level side to side.

The Boss air bags I installed to level the JATAC (see HERE) have been working perfectly so far. We recently drove into Mexico’s Sierra Madre to retrieve some trail cameras we had set up to survey mammal populations on a remote property owned by the Catholic Church. The last 12 miles requires four wheel drive, and several sections flexed the suspension past its limit so we wound up with one wheel in the air. The Boss bags took it in stride.

When I installed the bags I temporarily hooked up a simple manual-fill arrangement. But the kit came with a very fine compressor and a remote switch and gauge, so last week I installed the complete system to give us push-button control of the bags.

We decided to install the switches and gauge in the camper rather than the cab of the truck, since it’s easier to check the level back there. It also gives us the capability to quickly tweak both the fore and aft and side to side level of the camper when parked. The question was, where to mount the gauge/switches, as well as the fairly bulky compressor. I located what seemed to be a perfect spot for the controls just inside the camper’s door on the left, above the two switches that control the LED interior footlights and the exterior floodlamps. Since the battery compartment is right behind this spot, that would simplify wiring.

Pilot holes prior to cutting the opening. Painter's tape prevents scratching.

The compressor was more problematic, but eventually I located a spot I thought would work, inside the access port for the left rear turnbuckle that secures the camper to the truck. At the back, inside the hatch, the compressor barely fit vertically against the outside wall of the battery compartment—again minimizing the wiring run. 

The Boss controls come mounted in a steel panel designed to be attached to the underside of a dash, and that wouldn’t work for this application. I had some 1/4-inch-thick high-density plastic sheet lying around, so I cut a panel from that, drilled it for the gauge and switches, and painted it black with Krylon formulated for plastic. Then I trepidatiously took a jigsaw to the camper’s cabinet and opened a spot for the assembly. The result looked decent and is effortless to access for adjustment.

The compressor took much more winkling, especially because I wanted it secured properly so we’d never have to worry about it vibrating loose. With the help of a sidewinder drill and a bit of blood loss I was able to mount it to the plywood battery compartment wall with stainless bolts and fender washers. I ran the air lines down through a hole I drilled in the bed inside one of the stock little storage compartments. (Doing so confirmed that the fiber-reinforced material Toyota uses on their composite beds is tough stuff indeed; it felt and smelled like drilling through thick fiberglass.)

With everything hooked up, adjusting the level on the truck is as simple as pushing a switch. The way the system is designed, both bags fill at once, and you then use individual buttons to deflate one or the other bags to even them side to side. The clever gauge has two needles, one red and one green. You hook them up so nautical running-light rules apply: red for port (left) and green for starboard.

I won't say having to climb under the truck with a compressor to fill the Boss bags manually was exactly . . . hell . . . but the complete system sure makes it easy.


The ins and outs of airing down

$
0
0


Airing down in Egypt

My early four-wheel-drive experience was strictly trial and error, heavy on the error. A friend owned a beat-up mid-60s FJ40 shod with skinny Armstrong True Tracs and equipped with a Ramsey winch wrapped with a rusty steel cable. We took that thing everywhere, including trails around southern Arizona that I’d later learn were rated 4+ and even 5 on the vehicle-based system. When we got stuck or couldn’t drive up some ledge, which was frequently, we’d simply unspool the winch cable, wrap it around a big rock and hook it to itself (I know, I know), and pull ourselves out. The rocker panels on that poor 40 eventually got battered into gentle arcs (call it a “redneck body lift”). But we had fun and learned a lot—enough that when I got my own, much nicer, FJ40 I was able to keep its rocker panels the way the ARACO body plant meant them to be.

This do-it-yourself approach explains why I came late to the concept of airing down tires on off-pavement trails and four-wheel-drive routes—I simply didn’t hear about it until well into the 1990s, when I began subscribing to magazines that included articles by expedition travelers such as Tom Sheppard. It never would have occurred to me on my own that deliberately letting air out of one’s tires could be a good thing.

Now, of course, the benefits are well-known to anyone who has read anything about overland travel: Reducing tire pressure to suit the conditions allows the tire to more effectively mold itself to the terrain. That increases traction, which reduces wheel spin. That in turn reduces trail damage as well as stress on the vehicle’s drivetrain and wear on the tire itself. In soft sand the enlarged footprint (which comes mostly from lengthening of the tire carcass, rather than widening) provides hugely increased flotation. It’s basically a win-win-win technique, as long as one is circumspect about mixed terrain: You might choose 14 psi for soft sand unless that sand is interspersed with sharp rocks likely to puncture a sidewall (as we encountered in Egypt with the dreaded kharafish—razor-edged lumps of limestone). Airing down even enhances ride comfort on rough roads, as it allows the tire to conform to small obstacles rather than bouncing over them.

If the benefits of airing down are so well-known, why don’t more people practice it? It boils down to two issues: sheer laziness, and lack of proper equipment. And the former is often caused by the latter. If you have to deflate each tire one at a time using the awl on your Swiss Army knife or the button on the back of a tire gauge, and if re-inflation is a 45-minute process tackled with a $29.95 compressor (“with flashlight!”) better suited to blowing up volleyballs, you’re just not likely to do it unless you actually get stuck first.

Since tire failure—whether a simple puncture, losing a bead, or damaging a sidewall—is still the number one cause of vehicle breakdowns, a high-quality compressor should be part of your kit anyway. In fact, after the most basic upgrades on any 4WD vehicle—tires, for example—a proper compressor comes near the top on my list. Maybe even before a fridge. 

With a good compressor to handle re-inflation, your next goal is to avoid prolonged genuflecting in front of each tire, letting air hiss out slowly though the valve. There is a dirt-cheap way to accomplish this: Buy a valve-core removal tool. Although it seems drastic, removing the valve core is the absolute quickest way to deflate a tire, yet it’s not so quick as to be difficult to control. Your pressure gauge will still work, and you just need to be ready to reinsert the valve core when the pressure gets close to your target.

The big problem with this technique—besides the fact that it’s a manual, one-at-a-time procedure—is that the tire pressure will do its best to wrest the tiny valve core out of your grasp just as you’re removing (or reinserting) it, and send it flying ten feet over your shoulder. By the time you find it (assuming you can), you’ve got a flat tire.
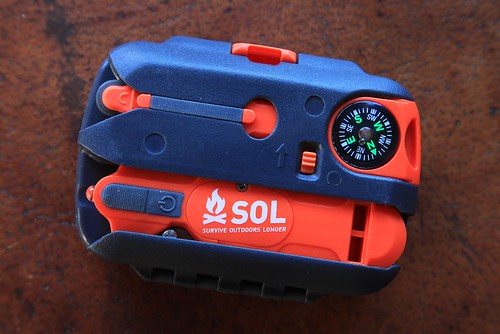
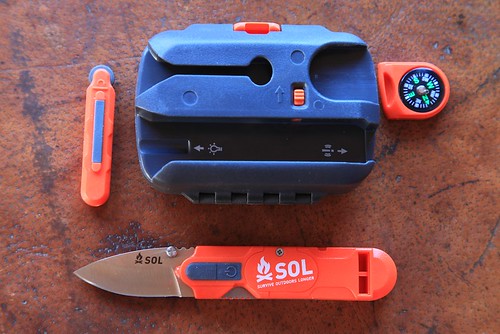
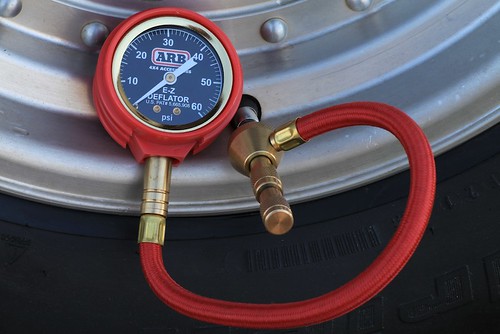
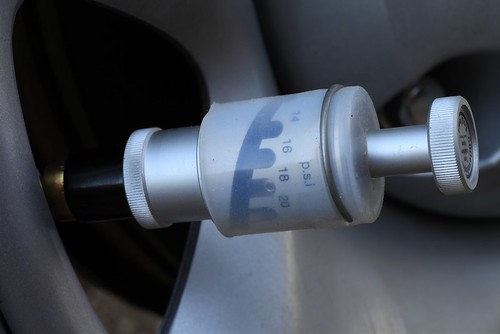
A safer and more stylish approach to the VCR technique can be had with the ARB E-Z Deflator. This tool comprises an elegantly complex brass fitting with a hose and gauge. The fitting screws on to the valve stem, and a separate knob then unscrews the valve core but contains it securely within the mechanism. Pulling back on the collar attached to the air hose and gauge then allows air to escape with a satisfying whoosh. Push back in to stop the flow and check the pressure. It appears to be just as fast as the riskier method—I deflated a 235/85 R16 BFG All-Terrain (my reference tire for the entire test) from 40 psi to 18 in 33 seconds flat.

However fast it is, the ARB still requires full operator attention—which brings us to automatic deflators. While not as quick individually as valve-core removal, you can be doing other things, such as chatting to your friends, getting a snack, or checking the vehicle, while the tool does its work, and if you have multiple deflators the total process can be quicker than the fastest one-at-a-time technique. In fact, with two of the types of deflator reviewed here, you can drive off while they’re attached and working, thus reducing the time stopped to a couple minutes, and pretty much eliminating your last excuse not to do so.
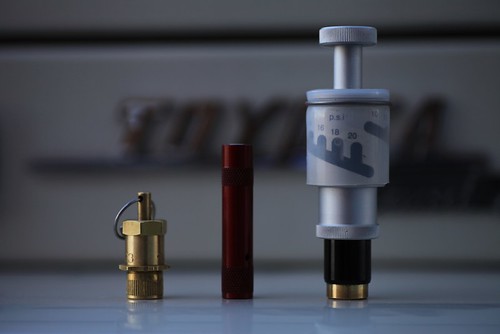
Left to right: Staun II, Trailhead, and CB Developments automatic deflators

The mechanics of an automatic tire deflator are deceptively simple. Essentially the device comprises a plunger with a seal, and a spring calibrated to compress at a certain psi to allow air to flow past the seal and out of the tire. By using a screw-in cap as a base for the spring, its tension can be altered to allow multiple settings in one deflator. The engineering feat is to produce a device that will do this accurately and repeatably over a broad range of pressure. 

Coyote Enterprises Staun II $80 (set of four)

Staun is the grandfather of deflators, designed in Australia in 1998. I had one of the early sets, and while they were convenient, I found the target pressure to vary by as much as two or three psi—potentially critical if you’re airing down to the low teens (below one bar) in soft sand. Go too low unintentionally and apply too much welly or steering lock and you can pop the tire bead off the rim. So I was curious to see if the newer style would be more accurate.

The second-generation Staun (made in the U.S., and covered by a lifetime warranty) benefits from a number of modifications. The claimed range is now an astonishing 3 to 50 psi—the original Stauns needed three part numbers to cover this span. Two sets of springs are included to adjust the limits. Also, there is a manual start ring, which among other things allows you to initiate deflation if there is insufficient pressure difference to trigger it otherwise—say, if your tires are at 21 psi and the Stauns are set to 18, or if you want to bump the pressure back down after airing down on a cold morning and driving until the tires warm up (they regain a bit of pressure when hot). The new Stauns also take only two or three turns to lock onto the valve stem. Finally, the maker now sanctions driving off with the Stauns in place and letting them work en route.

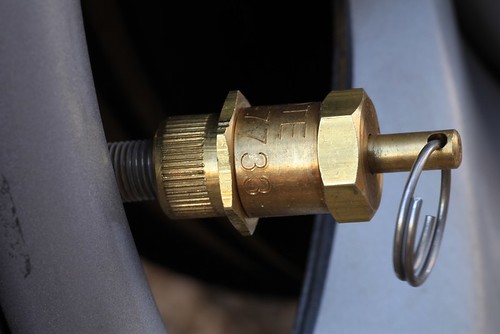
Made of solid and confidence-inspiring brass, the Stauns come with a clear set of calibrating instructions. First, manually deflate a tire to the nominal pressure at which you want to set the Stauns. Turn the hex locking nut and the top of the deflator all the way down (clockwise). Now screw the deflator on the tire until it’s snug, and slowly turn the top of the deflator counterclockwise until air is released. Immediately turn it back clockwise until the air just stops, then turn the lock nut up until it locks the body in place. That’s it. If you prefer different pressures on the front and rear of the vehicle, you can set two to each, and file a notch in the edge of one pair to identify them.

I used 18 psi as my target—it’s a good rough-trail pressure for my FJ40 and many similar-sized vehicles. If you’re quick you can calibrate all four deflators on the reference tire without adding air, but I bumped it back up with the compressor after two (the 235/85s don’t have a lot of volume). With the tire reinflated to 40 psi, I screwed on one of the Stauns and clicked a stopwatch. Three minutes and 19 seconds later, the device snapped closed, and my calibrated gauge confirmed that the shutoff pressure was dead on 18 psi. Reinflating to various pressures and trying the remaining three produced nearly identical results: None was more than a half pound off. Furthermore, with the manual-start ring I found I could initiate deflation even when the tire pressure was only two or three psi higher than the set pressure. 

You can estimate a new setting on the Stauns in the field by loosening the lock ring and turning the cap. One turn either direction (clockwise to increase, counterclockwise to decrease) equals “three to four” psi according to the instructions. Mine seemed to do about three per turn, but it’s definitely a rough guide.

Given its accuracy and additional features, the Staun II is clearly a worthy upgrade to the original.

Trailhead $75 (set of four)

Trailhead (originally Oasis) deflators pioneered the “drive-away” function, which made stopping to air down a two-minute procedure. While the Stauns now offer the same capability, I have to admit I was hesitant to do so given their relatively weighty brass construction. Not so with the Trailheads—each slim anodized-aluminum unit weighs barely ten grams, compare to 25 for a Staun.

The procedure for calibrating the Trailhead deflator is a contrast as well. Using the included 5/32 hex key, you unscrew the internal cap until it is perfectly flush with the body. This represents the lower end of the range (5 psi on my 5 to 20 psi model; a 15 to 40 model is also available). From there, each full turn back in supposedly represents an increase of 1.5 psi. To get to my target of 18, I counted up—6.5, 8, 9.5, etc.—until I got to 17, and then added about two-thirds of a turn to estimate 18. I screwed on the deflator and hit the stopwatch, and it shut off just two minutes and 19 seconds later. However, when I checked the pressure in the tire it was at 20 psi. I gave the cap a full turn back out and tried again. This time, after two minutes and 31 seconds, it was within a half pound of 18. I tried the same procedure with the other three units, and each one stopped around two pounds short of the target pressure. So setting the Trailheads precisely required more fiddling. Once finished, however, they remained accurate.

The Trailhead deflators have no manual start function, and the instructions caution that initial tire pressure must be roughly twice the set pressure for them to self-initiate. I found that a bit pessimistic—mine would all initiate at 32 psi when set to 18. But trying again at 30 produced only silence. So if you drive a vehicle that takes that 30 psi on the road, you’ll have to air down to 16 or below for the Trailhead deflators to work. 

The Trailheads can be bought in mixed colors —aluminum, red, or blue—making it easy to identify when you set them up differently for front and rear tires. They are made in the U.S. and come in a pouch with instructions, the hex key, a tire gauge, and a handy tire deflation guide.  

CB Developments Mil-Spec Tyre Deflation Valve $100 (each)

Compared to the lengthy calibration sequence necessary to set up the Staun and Trailhead products, the procedure for CB deflators couldn’t be more different: There isn’t one. Push and turn the knurled knob so the pin indexes with the target psi on the body of the deflator, and screw the assembly on your valve stem. That’s it. No need to deflate a reference tire, and no need to use math and a wrench if you want to change settings for differing conditions (or different vehicles) in the field—just turn the knob to the new target. I set one of the CB deflators to 18 psi, screwed it on my 40-psi test tire, and just two minutes and 22 seconds later it was finished, beating out both the Staun and, by a slim margin, the Trailhead. Furthermore, every setting I tried, all the way down to 10 psi, was within a half pound of my calibrated gauge. And the deflator would initiate with as little as two pounds of difference between the tire’s pressure and the target. An excellent performance.

Of course, you pay for that convenience, speed, and accuracy. A single CB deflator costs significantly more than an entire set from Trailhead or Staun. A full set of four would be a frightening chunk of cash. And you cannot drive with the bulky CBs in place, so are tied to the time it takes for however many you own to do their work. The CB deflators also lack the upper range of the Stauns or Trailheads—the highest range model carried by Extreme Outback Products, the U.S. distributor, stops at 20 psi (CB Developments makes another that extends to 24). That means those of you with Sportsmobiles and other heavy rigs, who consider 40 psi to be “aired down,” are out of luck. In fact 20 psi might be marginal for our Tacoma and Four Wheel Camper in anything but soft sand; on the road we keep 50 psi in the rear E-rated BFGs.

Conclusions

All these deflators worked as advertised, and all were very accurate once calibrated. So in a way you can’t go wrong. But in the end I did have preferences.

The Trailhead deflators boast the lowest cost—I’ve seen street prices under $60 for a set—and they were significantly faster than the Stauns. The multi-color option is a nice feature. Their single-hex-key adjustment makes them easier to manipulate than the two-piece adjusters on the Stauns—although as we have seen, the Trailheads take more fiddling to arrive at the target setting. But their biggest drawback is the lack of a manual-start function, and the significant difference in pressure necessary for them to self-initiate. I can recall many situations I’ve been in where they simply would not have worked.

The Staun II deflators run roughly $10 more per set than the Trailheads. However, for that you get a much wider pressure range in one part number, faster calibration, and the ability to initiate deflation with just a few psi difference between the tire and your target. Their sole downside was the slower speed, if the difference between two and a half minutes and three and a quarter minutes is critical to you. I’ll be curious to see how a potential “Trailhead II” deflator responds to the Staun II challenge.

The CB deflators are in a league of their own, in performance, convenience, and price. As long as the psi settings you require lie within the range of the device, there is no easier or more accurate deflator. I keep a pair in my FJ40, and their versatility more than makes up for the fact that I have to deflate tires a pair at a time. If I need to reduce pressure from my nominal 18 to, say, 14, it’s the work of an instant to change the setting—no guesswork needed.

Among the automatic deflators, then, the CB Development Mil-spec product wins if price is no object and the range fits your vehicle. If you baulk at the thought of a $400 set of deflators (or even $200 for a pair), a $70 set of Stauns will serve admirably—and suit a wider range of vehicles to boot.

As to the ARB EZ Deflator, while it is a manual tool, it is in many ways the most versatile of the bunch. If you have a Global Expedition Vehicle* at one end of your garage that you only air down to 55 psi, and a rock buggy with beadlocks at the other end that you take down to four, the ARB is the only tool here that will handle both—and anything in between. At $40 it is the least expensive of all these options. (*That is, ahem, if you didn’t order the GXV’s optional central tire inflation system, which makes this entire article a moot point for you . . .)

Searching for a bottom line, I ran a series of back-to-back double-blind experiments controlled for temperature, humidity, and elevation, and determined that the mean time to stop the truck, deploy a set of Staun deflators, let them finish, and pack them away again is six minutes 37 seconds—which happens to be the exact time it takes to retrieve a cold Coke from the fridge of the JATAC and finish it while sitting in the shade.

Staun deflators at work in the Rift ValleySource links: ARBTrailhead, Staun (Coyote Enterprises), CB Developments (Extreme Outback Products)

Viewing all 72 articles
Browse latest View live


Latest Images